Hello friends,
Thanks for joining me today.
I’m sharing a fun, quick and easy idea for creating with a digital kit and I hope it inspires you to give it a go.
I’ve shared a version of this project last year using the retro kit, but today we are going to add in some fun collaging to take this project to the next level.
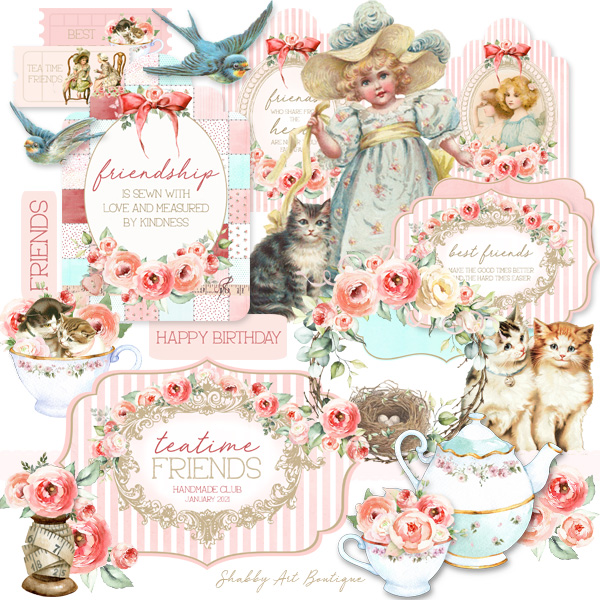
Even though I’m using the Teatime Friends kit, you could use any of your paper craft supplies or even one of my other digital kits.
But first…. I’m wondering how you feel when you get new crafty supplies or perhaps a new digital kit?
Do you get that tingly feeling of anticipation… you know that rush of excitement and your creative mind starts working over-time?
Or are you initially excited and then suddenly panicked, not knowing what to make?
Of course there is no right or wrong answer….. we are all different.
While I’m definitely the over-the-top excited kind, who can’t sleep because I’m planning projects in my head, I have known many students and customers over the years who become so overwhelmed when they get new craft materials, that they literally can’t make a start.
I’ve had a few customers tell me that they are overwhelmed by the quantity in my digital kits… and I totally get that. Some people already have like a zillion ideas running around in their heads and they simply need to match up the graphics with the ideas, while others have no clear projects in mind, so there are endless options.
If you are wondering what to make this week… let’s see if I can get you started on a project!
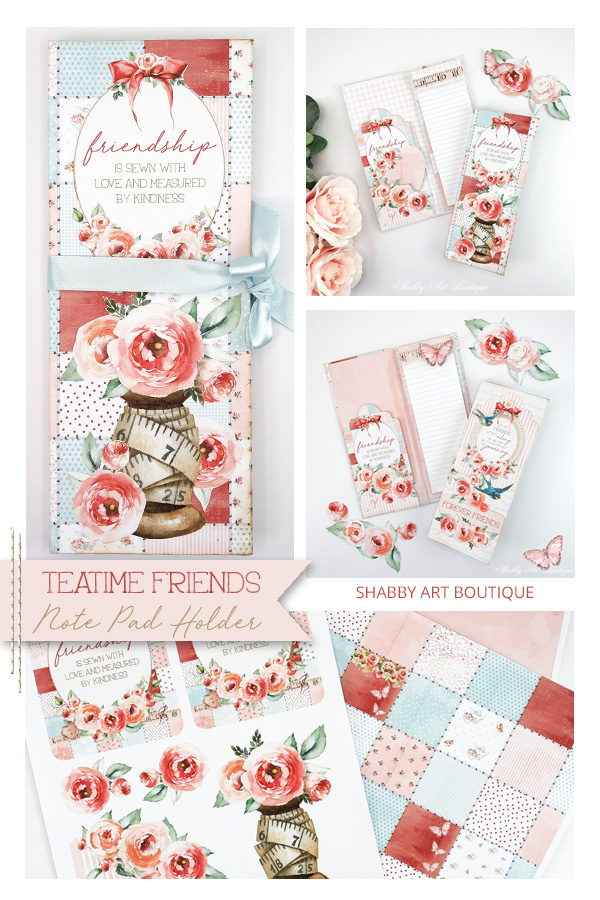
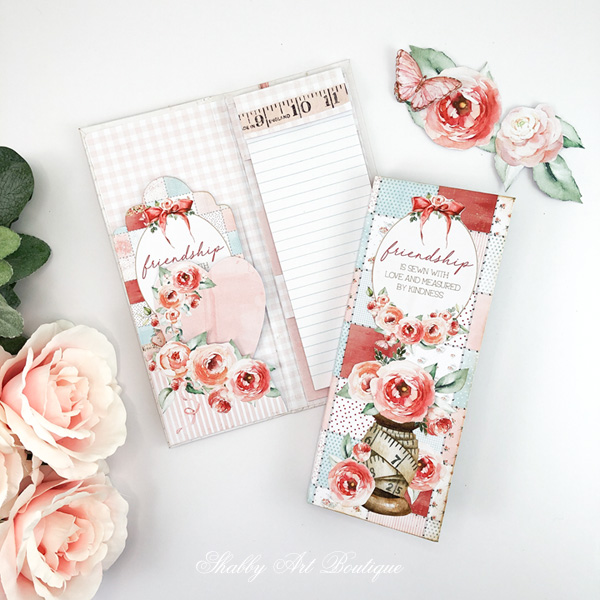
Note Pad Holders
This is not a new project at Shabby Art Boutique. I’ve been making these for years and I shared a tutorial on how to make the note pad holders last year.
Not only are they are easy to make, but they look pretty impressive when you give them as a gift.
Given the ‘friendship’ theme in the Teatime Friends digital kit this month, I knew they’d be the perfect project to make for friends.
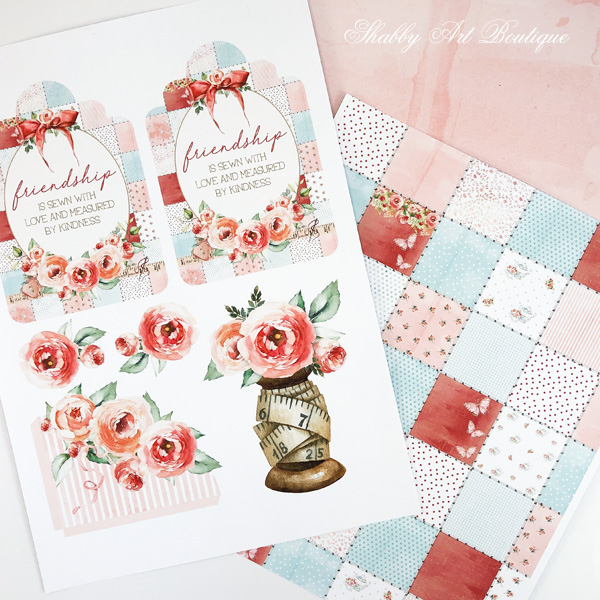
I simply gathered some items from the Teatime Friends kit; starting with 2 sheets of paper for each note pad holder (one for the inside and one for the outside), which is easy to do because all of the papers are coordinated to match.
Next, I wanted to add some collaged elements to the front cover and put a handy little pocket inside the cover. The pocket I used was already in the kit, but was sized for a junk journal, so I decreased it down to 3.5 inches wide.
I know some people are wondering how to do that and this next step will be dependent on your skill set.
If you already have a graphic program like Photoshop or Photoshop Elements, then you’ll most likely already know how to resize and set up your printable pages, but there are lots of people who don’t have those programs and want to be able to to make their own printable pages using the club graphics too.
How to create your own printable files
There is a program that you can use for FREE to start designing with the kit images. Click here to visit —-> Canva.
The best way to start is to click around the site and see what you can make… if you have not visit this site before, I’m sure you will be amazed at what it can do. It’s fairly intuitive too, but there is also a help button available if you need it.
There is an import tab in Canva, so you can upload the graphics from your kits and play around with layering to create printable pages…. like the one above with the items I used for the front cover of my note book cover.
Once you have created a printable page containing your items for the front cover, all you have to do is fussy cut them and adhere them with white glue – remember when paper crafting to use a thin smear of glue, so as not to make your paper bubble, stretch or tear.
Alternatively, if you are not ready to try Canva yet, you can print off the fussy cut file that came with this month’s kit and use the elements from there to decorate your note pad holder covers.
I love how these note pad holders turned out… what do you think?
Next I think I’ll make a teacup themed one to send to a friend and I could even slip a Twining’s teabag in the front pocket
I hope Canva opens up lots of new creative opportunities for you and inspires you to try out new project ideas.
Once again, if you want to make these Note Pad Holders you’ll find the tutorial HERE.
If you’d like to know more about the Teatime Friends kit used in this project, please click here.
Happy crafting my friends!
Hugs
♥
Kerryanne
Let’s be friends on….


Get instant access to the free printables in my Newsletter Printables
Library by joining my email newsletter subscriber’s list.
I send out a weekly newsletters with updates on all things
‘shabbilicious’ at Shabby Art Boutique.
I invite you to join our fabulous and friendly
Facebook group – Simply Shabbilicious
where you’ll enjoy our friendly banter and inspirational creativity.


Oh these will be so fun to make! I love little notepad holders. Love your Teatime and Friends kit too! I don’t have Photoshop, etc. but use ipiccy.com which is FREE and you can design all sorts of collages for free using bits and pieces. To resize, a person can also use Microsoft Word and resize anything to a specific size! I use that also. I’m one of those people who gets all excited and tingly when I buy or get new digital items, but then I get overwhelmed thinking of all I “could” make, and then I end up making nothing! I have a list a mile long (in my head) that I want to make using your monthly kits, but so far haven’t made anything. One kit I do have printed out to make a journal, but that’s as far as I got. I don’t know how to resolve it! Marilyn
Marilyn, I totally understand what you are saying. My suggestion would be to have either a creative planner or an art journal where you can document your ideas and plan them out. It does take a lot of organising to be creative all of the time. I either write, sketch or plan in my art journal every day. I also have a creative planner for Shabby Art Boutique, so I can plan ahead, make sure I have the supplies I’ll need and also to keep a list of ideas that are just waiting to explode into a creative project. Maybe you could set yourself a set time on the calendar to complete a few tasks…. having a deadline to meet keeps us in check.
I hope those ideas help… they have certainly helped me from time to time.
Happy crafting! Hugs ~ Kerryanne x
You gave me some good ideas! I do keep a notebook of “ideas” and things I need(?)…. ha ha…. but it is kind of unorganized. A special journal with just ideas would be really good for me if I can keep on track. I get distracted too easily, or get too many ideas and then just sit on them! A Creative Planner is a great idea! thanks so much! Marilyn
What a sweet gift this would make! And so much more pretty and personal than the ones you find at the dollar store.