Today I’m sharing the ‘secret sauce’ on making banners.
They are an inexpensive and fun element to add to seasonal vignettes and that’s why I frequently include printable banners in my kits for the Handmade Club.
Although they are quite easy to make, I do often receive questions like “I’ve printed off the banner, now what do I do with it”…. or “why doesn’t my banner look like yours?”…. so today I’m sharing my hot tips for making banners that will pop!

How to make amazing Christmas banners
1. What to make your banner with? I’ve used a printable banner kit and graphics for this one shown, from my October Handmade Club kit, but you can use any scrapbook papers or digital printables.
I print mine on 250 gram matte photo paper (feels like light card). I find it has the perfect weight for these types of paper crafting projects…. firm enough to hold it’s shape, yet still thin enough to cut easily with scissors or a craft knife.

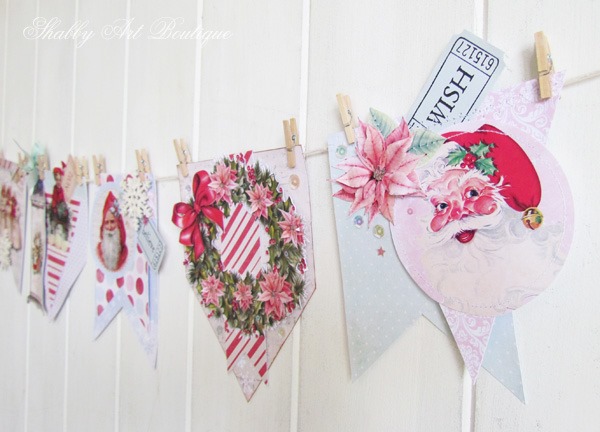
2. Layers, layers, layers!!
Hot tip number 2 and an important one…. using lots of layers in your individual banner pennants gives them texture and interest.
Print off the papers and banner pennants (if you have a kit) and decide which ones will be used together to create each layered pennant. You can group 3, 4 or even 5 shapes together.
Next we’ll work on each banner piece as an individual art work.

3. Embellishments
Collect all the embellishments you wish to use for your banner: ribbons, lace, ric-rac, glitter, sequins, small tags and tickets, flowers, chipboard cut-outs, bells etc.
If you are making a themed banner or have a specific colour palette, it’s even easier to create a collection of embellishments to use.
I used many of the items from this kit for the Christmas banner shown.

4. Assembly
This is my favourite part!
Lay everything out on your table. This is basically a big collage project, so you want it all on show.
You’ll need various tools: cutting mat and/or cutting tools, adhesives (I use both white and clear glue), all your embellishments. I often use my sewing machine too.
There are two ways to tackle the creation of your banner; you can work on one pennant at a time or lay the banner pennants in front of you as they will hang when assembled.
I tend to to do more of the second option, so I can gauge how I think it will flow once assembled. When I’ve worked out which layers and items are going together, I start viewing them as individual art works.

This is the fun tactile part…. I love to create by hand…. cut, rip, tear…
Add bows and ribbons, pop in a ticket here or there…. and lots of fun elements. Just keep layering. Try to add different textures in your layers too.
Enhance further with sequins and glitter. I even added in snippets of tinsel and diamond headed pins on this one…. because it’s Christmas after all.
Once each pennant is assembled, string them together. You can use tiny pegs, glue them to a string line or even punch holes in them so you can thread them on to your string line. Lots of different options for hanging!
Make them big and hang them for all to see… make them small and decorate a card to tag…. it doesn’t really matter, they are just such fun elements to add to your decorating for Christmas.
[PIN for later]

All of the items shown in the above banner are included in the October kit for the Handmade Club, which is available to purchase up until November 14th, 2019.
Here’s another Christmas banner that I made last year….
Same principle… lots of layers and pretty embellishments.

Happy Christmas crafting my friends,
Hugs
♥
Kerryanne
I’d love for you to connect with me at:


Get instant access to the free printables in our Member’s Only
library by joining my email newsletter subscriber’s list.
I send out two newsletters a month with updates on all things
‘shabbilicious’ at Shabby Art Boutique.
Follow on Bloglovin or join our Facebook group Simply Shabbilicious.


Love how yours turned out! I definitely need to get back to practicing my paper crafts – I miss it.
Alexandra, I hope you do get back to your paper crafts. It’s very relaxing and I find the free form style of collage to be a great creativity boost in general. Enjoy your weekend!!
What a great tutorial, Kerryanne! I’ve pinned to my Christmas board! Thanks for sharing your secrets with us!
Thanks Julie and I appreciate the pin my friend 🙂