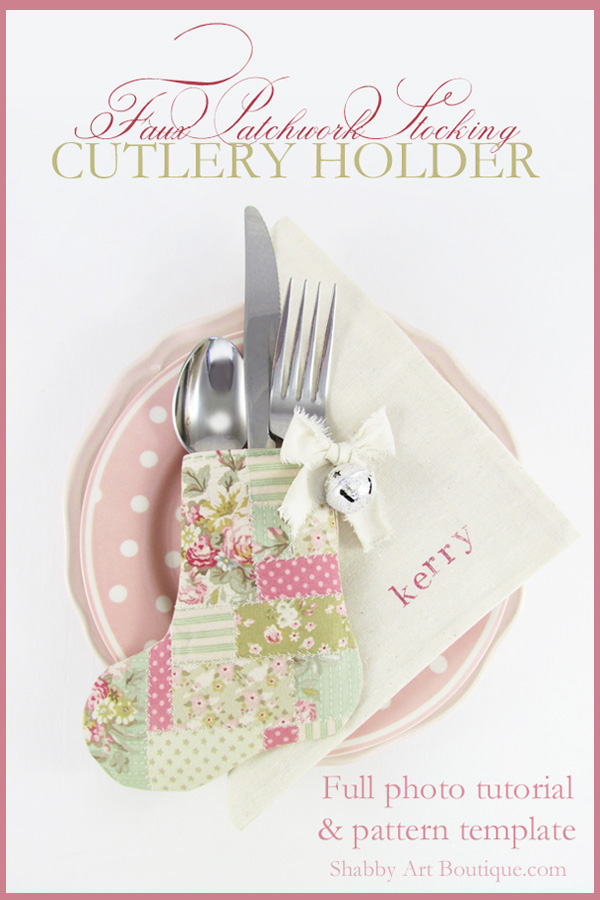
I’m trying something new for our Christmas table this year.
It’s a bit shabbilicious… meets pastel cottage!
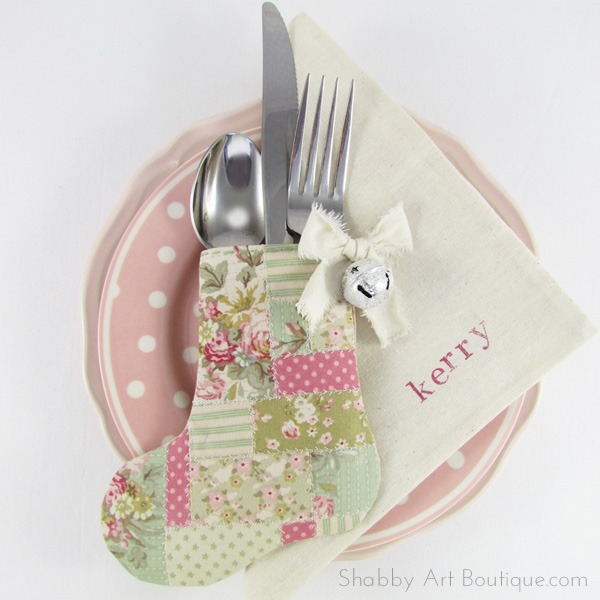
Yesterday I showed you my hand stamped napkins and today I’m sharing a tutorial for making my faux patchwork stocking cutlery holders.
[Pin for later]
I’ve made my stockings in sweet Tilda fabrics, but this design would be equally as gorgeous in more traditional colours. This tutorial is just an example of how you can make them and is intended to be an inspiration.
Materials:
Scraps of pretty fabric – can be quite small off cuts.
Calico for backing of faux patchwork and extra for lining stockings x 2.
Fusible webbing.
Template.
Sewing supplies.
Sewing Instructions:
1. Depending on how many stockings you are making, either cut one piece of calico per stocking measuring 18 cm x 15 cm or cut a much larger piece and cut all the stockings form the one patchwork piece. The calico fabric forms the base on which you build your faux patchwork.
Randomly attached pieces of fabric to the backing with fusible webbing. All the fabric pieces were cut freehand… and nothing is perfect.
Using your stocking template, trace the stocking onto the back of your patchwork panel.
2. When all of the base fabric is covered, I chose a fancy stitch on my sewing machine and edged all the little fabric pieces. It looks kind of like patchwork… if patchwork was imperfect.
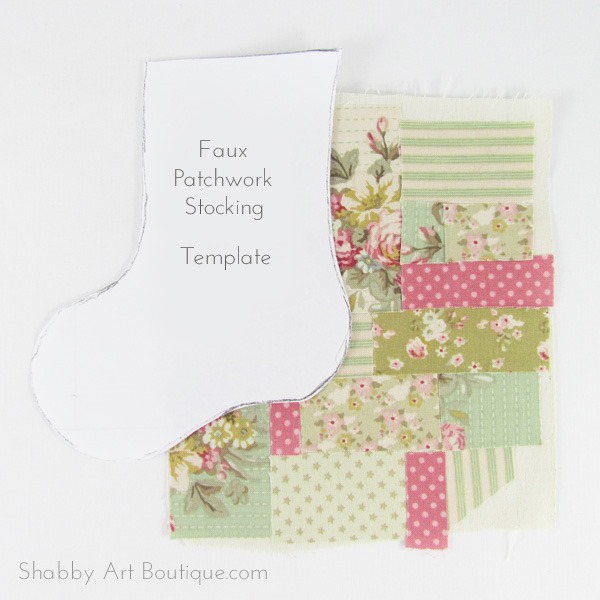
To download the template, simply click graphic to open full size in another window and right click and save image to your own computer.

3. Cut out your stocking shape from faux patchwork, allowing a 1/4” seam allowance.
From template cut another stocking for the back. Rather than use patchwork again, I chose to cut the back side of the stocking from a piece of coordinating floral fabric.
Cut 2 more calico stockings for the lining.

4. Join one lining piece to one printed piece at the top of the stocking as shown on the left in the image above. Repeat with remaining two stocking pieces. Press with iron.
Place the stocking panels together with right sides facing.
Sew around the stocking outline, leaving a reversing opening in the lining, as shown on template.
Clip seams and turn stocking right side out through the opening in the lining piece. Stitch up the opening in lining with a small running stitch, then push the lining piece down inside the stocking.
Be sure to push all the areas out neatly, you may need a pointed tool to assist you.
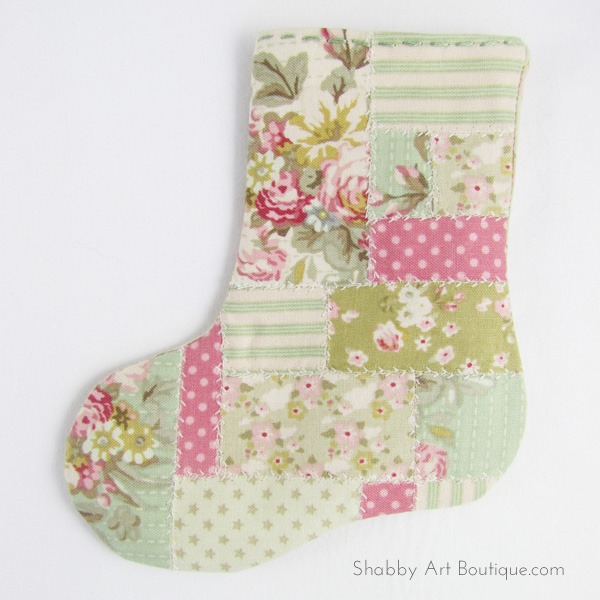
5. Press stocking with iron. I chose to stitch a running stitch of DMC cotton around the top of the stocking to secure the lining in place.. plus it kind of adds to that handmade look.
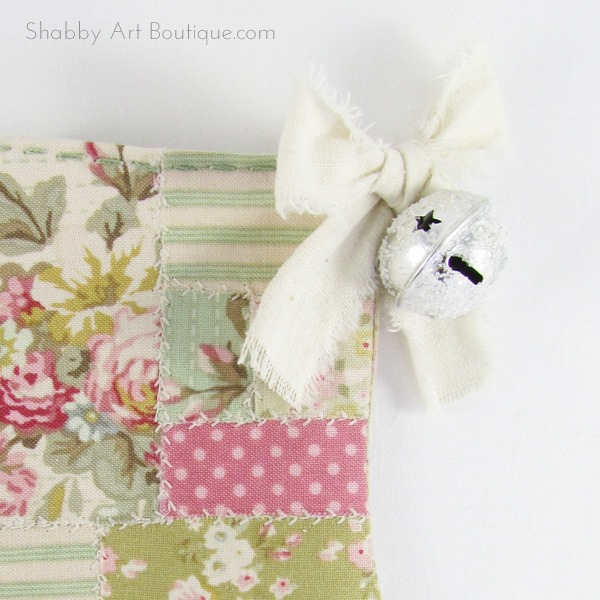
6. I made a bow out of a ripped strip of calico fabric and stitched it to the top of the stocking (optional). I also frosted a silver bell by coating it in Mod Podge and then dipping in German Glass Glitter, before attaching to base of bow.
I’m really pleased with how my little stocking cutlery holders turned out and they are fairly quick to make too.
Tomorrow I’ll share a few sneak peeks of my Christmas dining table.
You can see more of my Christmas projects and free printables on my Tutorials page.
Happy festive crafting,
Kerryanne
I’d love for you to connect with me at:


Follow on Bloglovin
or if you’d like my posts delivered directly to your Inbox
Subscribe to Shabby Art Boutique by Email
If you’d like a private pass to all things ‘shabbilicious, sign up today for my fortnightly newsletter. It contains personal stories, sneak peeks, recommendations, discounts and freebies.


These are sooo adorable! I do quite a bit of heirloom sewing and I’m trying to imagine them using different lace techniques and heirloom stitches.I can’t wait to start experimenting.
I love your work! I always enjoy your posts, but this project is so adorable that I had to actually say something! Awesome and thank you for your blog.
xoxo,
Sheila in Denver
What cute cutlery holders – they look super Kerryanne and such a lovely idea.
Toni xx