Sometimes you just stumble upon a project and you know it has to go on your ‘Must – Do’ list.
I’ve seen variations of fabric peonies and roses popping up on Pinterest for awhile now… they resonated with me for several reasons.
Firstly, I’ve made fabric flowers before using the searing with the candle technique and know how quick and easy they are to make.
But… the main reason I’m so excited by these flowers is my yearning for Peonies. You see, I live in a sub-tropical climate where Peonies won’t grow. It’s simply too hot for them. I’ve never, ever seen a real one or smelt one, but I see them everywhere in blogland… and they look so lovely.
Oh, you know how it is when you can’t have something…. it suddenly seems even more appealing. That is how Peonies are for me.
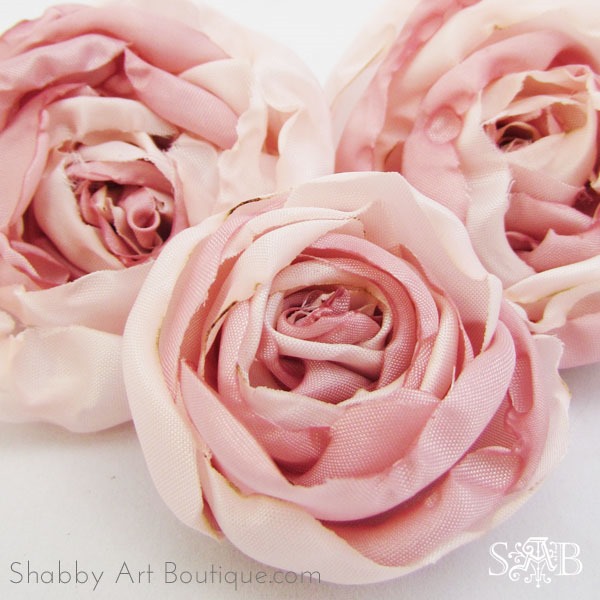
So I discovered these various patterns for making Peonies and began to made a few.
Then a few more… and next I altered the pattern and made them in all different sizes.
It became a growing addiction….

I’ll tell you another reason why I enjoyed making them so much…
This is one of the most relaxing crafts I’ve ever done. There’s something about gazing into the glow of a candle as you sear the edges of each petal.
I felt immensely disappointed when I got to the end of the 24 petals required for each bloom.
Thus, the cycle began again.
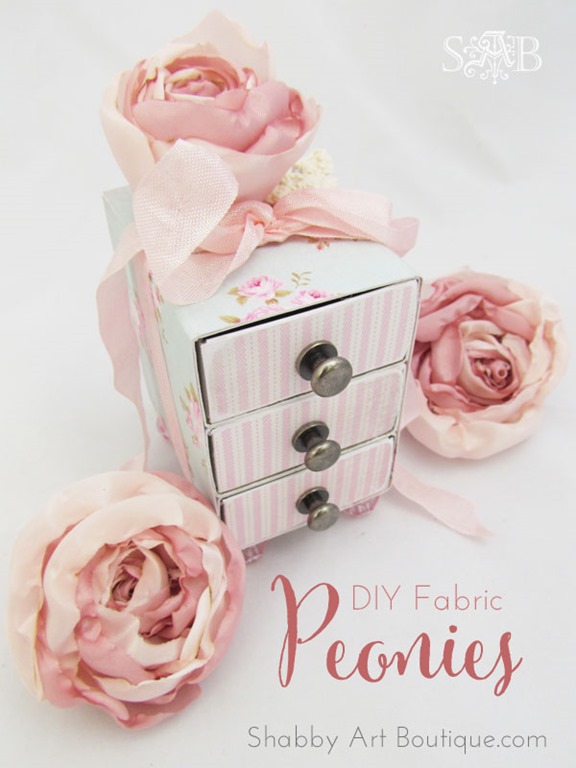
How to make fabric Peonies
Materials:
Silk or satin fabrics that will sear well. (I used silk lining in 2 similar tones),
Pattern template (right click image below and save to your own computer),
Scissors and pins,
Cotton and needle,
Candle.

Instructions:
1. You will require at least 24 petals – 6 of each size (I sometimes used more). Open the template graphic in a word program. Enlarge to appropriate size – I made 3 different sizes. Trace the templates and cut out. Pin template to 3 layers of fabric and cut out petals.

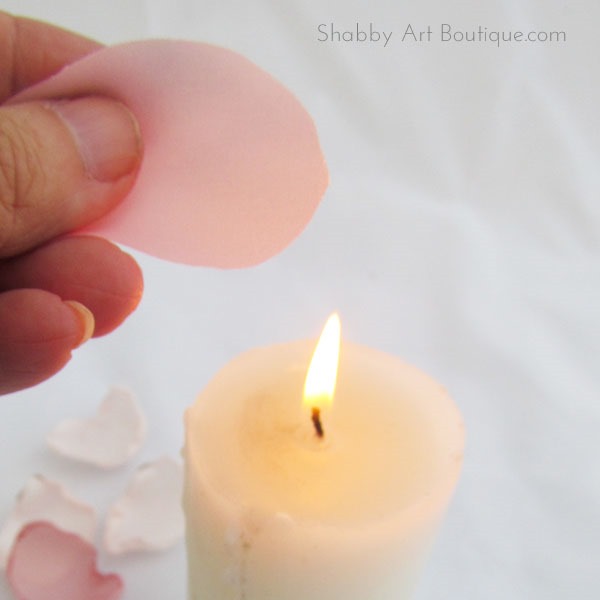
2. Hold the petal about 3 inches above the candle flame and carefully sear the edges. On some of the petals I melted just the very edge and there was minimal curl, but on others I allowed more curling to add bulk and shape to my Peony.
Whilst this step is incredibly relaxing, do take care not to allow the petal to get too close to the flame. I had one that flared up and caught fire, although the petal never came into contact with the flame. Gave me a heart start, I can tell you!!
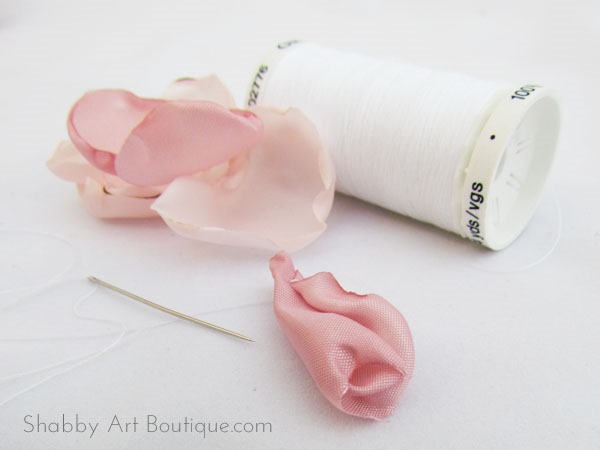
3. Roll up one of the smallest petals to form the centre of the bloom and use a couple of quick slip stitches to hold its shape.
4. Wrap the next petal around the first one and stitch the base as you go. Keep working in the same direction, slipping each new petal under the last before stitching in place at the base. Alternate petal colours if using 2 or more colours.
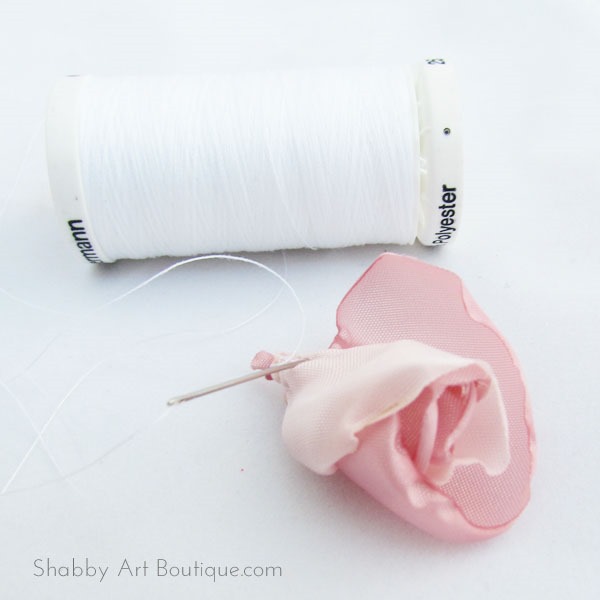
5. Continue adding petals, allowing them to rise above the centre as you work your way outwards. When finished, tease out the petals to add fullness to your bloom.

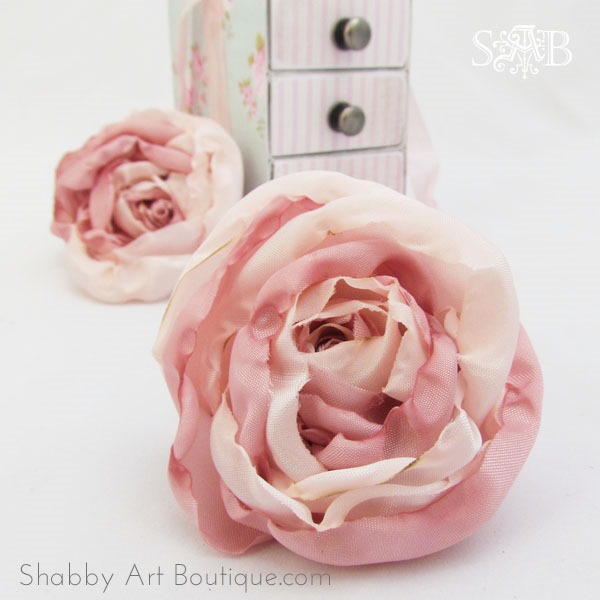
Finally, all you have to do now is decide how you’ll use your gorgeous Peonies.
So far I’ve added them to gift boxes, filled a bowl with them and added some to vintage vignettes.
Happy crafting my friends!
Hugs
♥
Kerryanne
Let’s be friends on….


Get instant access to the free printables in my Newsletter Printables
Library by joining my email newsletter subscriber’s list.
I send out a weekly newsletters with updates on all things
‘shabbilicious’ at Shabby Art Boutique.
I invite you to join our fabulous and friendly
Facebook group – Simply Shabbilicious
where you’ll enjoy our friendly banter and inspirational creativity.


Gorgeous, kerryanne!
ciao io ho provato con la fodera di raso come stoffa e l’organza ma mi si annerisce al tocco della fiamma della candela come posso fare?
Hello Sebastiana, Sei troppo vicino alla fiamma e stai bruciando il tessuto. Dovrai tenere il tessuto più lontano dalla fiamma, in modo che il tessuto inizi a ruotare, ma non a bruciare. 🙂
Kerryanne, these are stunning! I had peonies in my wedding bouquet; if I’d known how to make these, they would have been everywhere! Pinning and sharing 🙂
Peonies are beautiful! I grew up with them and now have thm in my yard. But once in bloom, if you get a rain they fill up with water and the stems break (even if supported) and that is the end. It can be very frustrating to lose them all at once. Better to have the handmade ones. I will love trying this. Thanks.
Absolutely gorgeous! You did such an amazing job!
Oh, Kerryanne, these are the prettiest ever. I will definitely pin it to Pinterest and give your tutorial a try! Thank you so much for sharing it with all of us.
xo,
Lin
Hello Kerryanne! I love peonies and these are just stunning! Thanks so much for sharing. Pinning! 😀
These are so beautiful, Kerrieanne, and I love the ritual of the candle. Thank you for showing us how. I made some roses a while back and I may have to try these, because they are so beautiful. When we fix my daughter’s satin pink ribbons on her pointe shoes we use a lighter, and it may work on this as well.
Oh my goodness Kerryanne, these are amazing!! I LOVE peonies too. Where do you come up with this stuff? Sharing on my FB page today 😉
Hugs, Jamie
How beautiful Kerryanne! I don’t think mine would ever turn out as good as yours, but perhaps someday I’ll give this a try. They truly look vintage1
Gorgeous1 We (my mother, sisters and I) all have peonies that came from my grandmother’s garden. Every time they bloom I think of her standing in her flower garden, clipping peonies, shaking them to remove the ants and then dropping them into a dishpan filled with water. And the fragrance is just so wonderful. I will use your tutorial to make some that I can share with my sisters. Thank you for such a wonderful tutorial!
Beautiful, they look so real and can almost smell their beautiful perfume Thank you for the tutorial Kerryanne. Have a great weekend. Shirley.
Stunning Kerryanne.
My Mum has peonies in her garden from deepest black/red to white – unfortunately many of the varieties do not have a scent but those that do are amazing. She also has a peony tree which has the most wonderful yellow blooms. I had some lovely peonies in my last home but although I transplanted several, they didn’t take here but my Mum split some of the plants before we moved and all hers survived – she obviously did not pass on her green fingers to me LOL.
Toni xx
Oh, one of my three favorite flowers! (My other loves are hydrangeas and wisteria!) I’ve not had an opportunity to try growing peonies here in North TX, but somehow, I fear that’s because they wouldn’t make it?!? Thanks so much for your generosity in sharing this lovely DIY … I can’t wait to get to the fabric store! (Most times I would actually have something stashed, but I’ve been clearing out with a *vengeance* lately!) I, too, understand the “draw” of a candle flame ~ that’s what makes this project extra appealing ~ and I have plenty of candles, so I plan to make plenty of peonies … !
I made the template and am going to make them also. I have a bush outside my back patio. Yours are absolutely the prettiest I’ve seen and hope to make them soon. The fragrance is almost like a rose. I can send you a bottle of fragrance if postal regulations allow. Let me know and I’d be happy to do that for you. I get all kinds of fragrances at a website in Florida. I think you’ll love the fragrance and can even scent the ribbon ones you make. And they don’t grow in very hot climates but I live in a desert in Idaho so we get very HOT and very COLD also. I’ve lived in 3 deserts four times in my life and love it like no other place we’ve lived. It’s peaceful and while I hate heat I have air-conditioning. But we can also get snow a lot. Perfect climate for this ol’ chick!!! Just let me know and give me an address.
xoxo,
Connie
These are so beautiful and look so real !! Your tutorial is done very well and can be understood exactly what to do. I am a “newbie” at all types of fabric flowers and the Peonies are my very favorite. Thank you so very much for sharing this. I can hardly wait to get started.
I really love these Kerryanne! So glad to have found your blog and can’t wait to read more. I’m more of a closet crafty person, but love to try new things. Everything is blooming here (Maryland, US) and I love flowers. Take care!
Joan
(somersethouse.me)
I lov making fabric flowers and im definitely going to make these thanks x
I can’t wait to try this ! I have done one but more of an open version, Not as many petals.. so this will be fun. I have three different kinds of peonies in my garden. I love them and it is sad that they are so short lived.
I love your peonie tutorial it is excellantly done. And ilove the flowers you made. Here where i live in Pennsylvania USA we have peonies in the Springtime. My two Grandmothers had them in their gardens, And i remember huge bowls of them on their tables, The fragrance was intoxicating! Thanks so much for the tutorial they are so beautiful! God Bless you! Sally Ann Edwarrds!
Love the Sea! Thank you so much for sharing Kerryanne.
Hi!
I am swooning over the ribbon peonies…do you sell them? I looked in your shop, however did not see them. They are quite beautiful, and I’m sure there must be other non -talented crafters like me! Lol
Hi Victoria, unfortunately, at this time I’m not selling any finished items. You may find some on Etsy though. 🙂
Thank you Kerryanne, I was wondering how you made these. Marian
They are super easy Marian and one of the most relaxing craft techniques I have ever made…. they are my go-to craft for de-stressing.
So gorgeous!! I’ve made lots of roses using a similar technique but will definitely try these!!!
Where did you purchase the silk fabric from? Those colors are lovely!
Hi Silvia, I purchased silk dress linings from our local fabric store here in Australia.
Love these! They are the best that I have found so far. Could you please post a photo of the bottom? I would like a better idea of how it is supposed to look. Also, just to be sure, you sew the long edge, cotrect.
I’d made several of these to use in a pretty arrangement. I’m making more now to use in conjunction with the baby birds in the nest graphics you shared for gift decorations & cards.
Tão lindas! Obrigada por compartilhar!
So beautifull your Work, congratutation.
Lindas!!! as peônias . Seu trabalho é magnífico . Parabéns !!!
Gracias por el tutorial mi madre tiene peonías blancas y rosasdas.florecen en noviembre.son muy bellas .voy hacerlas de tela . gracias
I’m in California, so peonies won’t really grow here either, but we can al least get bouquets around this time of the year. They are so beautiful! I wish I could send you pictures of the last two batches! Anyway- I’m going to make a peony inspired dress and your peonies are going to really make it come to life. Thanks for sharing this project!