Simply Christmas continues this week with more ways to get organised and making a start on a handmade Christmas.
It’s really important to get an early start if you are going to make handmade gifts and ornaments…. no one wants to be sewing the last stitch or gluing the final do-dads on Christmas Eve.
Okay… yes, long ago I’ve been that crazy mamma sewing and assembling fairy tutus and wings at 11 pm the night before Christmas… so take it from me, it really does pay to have it all ready in November. We want to cruise into the ‘silly season’ with nothing to do except enjoy the festivities.
So this week, I’ve asked some friends to join me for a ‘Handmade Christmas’.
Today I’m joined by the very talented designer Jenny of Elefantz, who has a very pretty stitching project she designed especially for Simply Christmas readers.
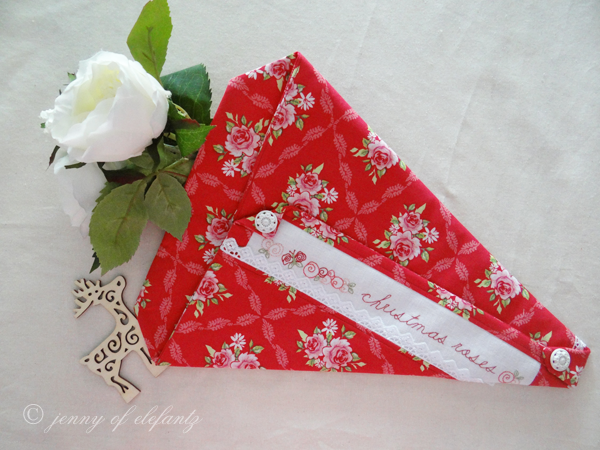
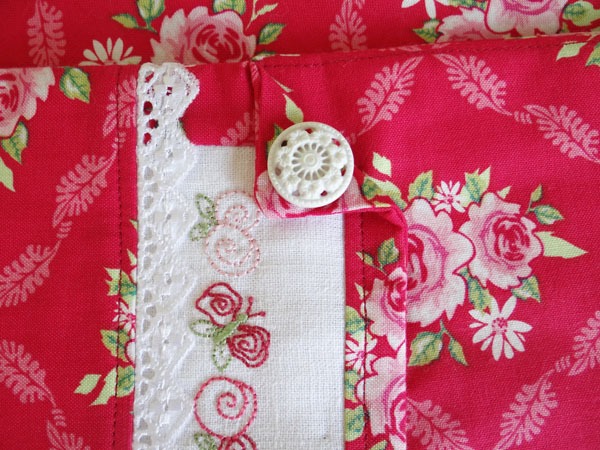
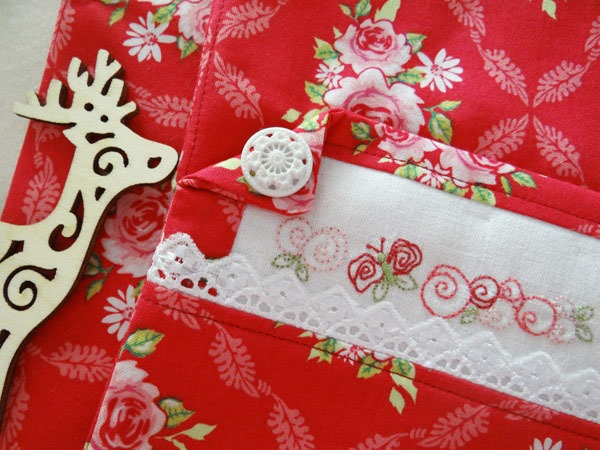
Christmas Roses Penny Pocket
There’s nothing prettier than a pocket full of rosey blooms; especially at Christmas!
I’ve used some lovely Tilda sweetness, vintage buttons, and pretty cotton lace to make my Penny Pocket.
You will need…
· One half metre/yard of red, pink & green roses print fabric
· One, 4 ½” x 13” length of a solid white linen/cotton blend, or you could use homespun
· One, 4 ½” x 13” length of Weaveline fusible fabric stabiliser
· 15” square of thin fusible Pellon
· Two ¾” diameter white vintage buttons
· A 15” length of ½” wide white cotton lace
· DMC Stranded Embroidery Thread, one skein of Light Pink (151)
· Anchor Stranded Embroidery Threads, one skein each of Medium Pink (38), Green (265), and Rose Red (39)
Cut from the half metre/yard of red, pink & green roses print fabric –
· One, 11 ¾” x 14” rectangle
· One, 14” square
· One, 2 ¼” x 1 ¼” strip
· One, 2 ¼” x 3 ½” strip
· One, 1” x 14” strip
Let’s start with the stitchery!
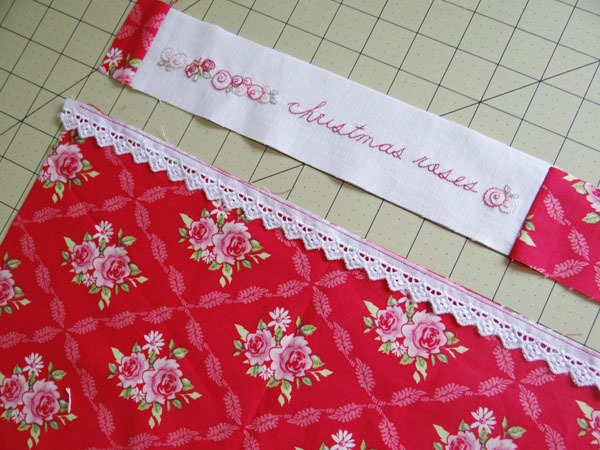
Trace the Christmas Roses block across the centre of your 4 ½” x 13” length of a solid white linen/cotton blend, and fuse the Weaveline behind it.
Backstitch the large butterfly wings with two strands of Rose Red. Backstitch the lower butterfly wings and the leaves with two strands of Green. Satin stitch the butterfly body and head with one strand of Green. Backstitch ‘Christmas roses’ with one strand of Rose Red. Backstitch the roses randomly with two strands of either Light Pink, Medium Pink, or Rose Red.
Trim the block to 2 ¼” x 10 ¼”.
Assembly…
Sew the length of white cotton lace, down the right hand 14” side of your 11 ¾” x 14” rectangle of fabric.
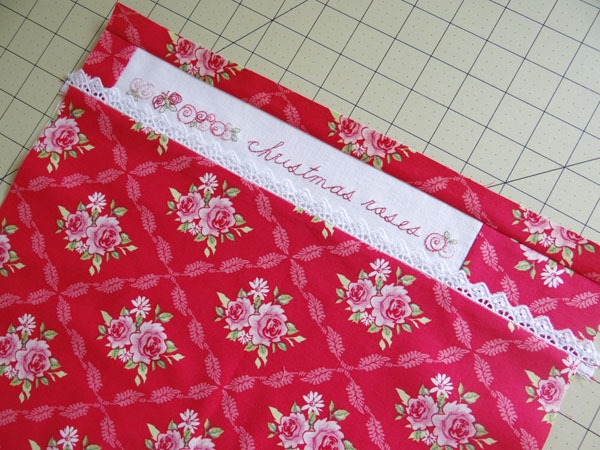
Sew the 2 ¼” x 1 ¼” strip of rose fabric to the left edge of the block, and the 2 ¼” x 3 ½” strip to the right edge.
Sew this block strip down the right hand 14” side of your 11 ¾” x 14” rectangle.
Sew the 1” x 14” strips of fabric down the right side of the block strip.
Fuse the Pellon behind the 14” square penny pocket front. You will have a little excess Pellon around all four sides, but we’ll trim that after you finish the quilting.
Machine quilt in your preferred manner. Trim the excess Pellon from the edges.
Lay the quilted Penny Pocket front face down on your 14” square of roses fabric.
Sew around all four sides with a ¼” seam, leaving a 4” opening along the middle bottom edge for turning out.
Trim the corners, and turn the Penny Pocket right side out. Press flat, and ladder stitch the opening closed.
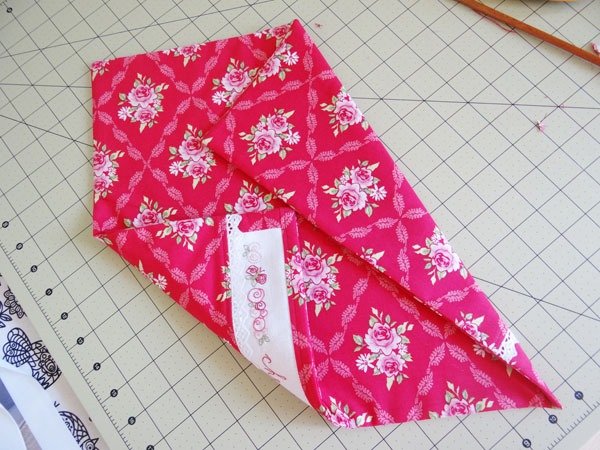
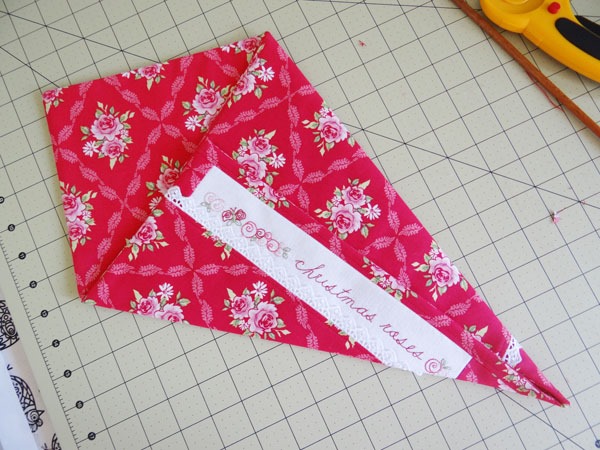
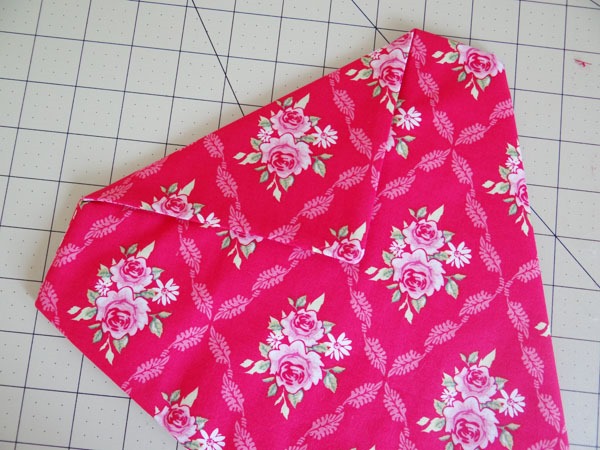
Lay the Penny Pocket face down in front of you, in a diamond position.
Fold in the two sides so that they overlap by a little over an inch at the top, to a point at the bottom.
Pin them in place.
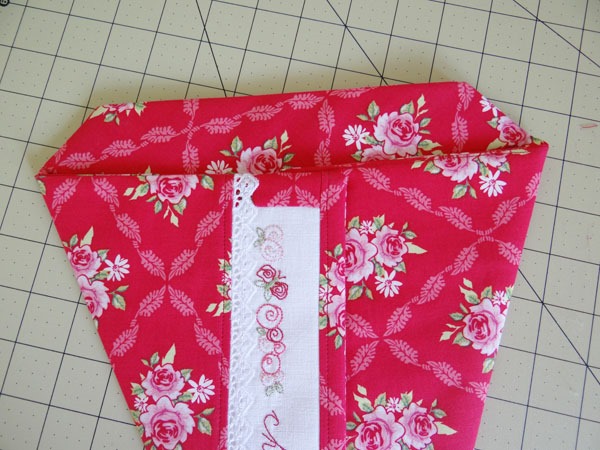
Fold the top of the Penny Pocket over to the back, 1 ½” above the top edge of the front block section, and secure with a few carefully hidden threads.
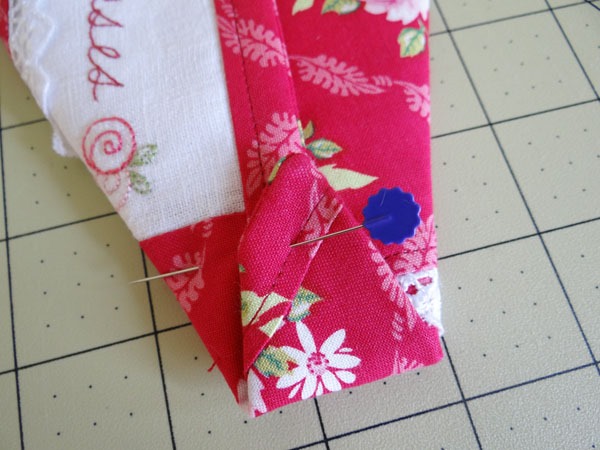
Fold the bottom point up, pin in place, and then secure with one of your vintage buttons.
Turn a small corner over at the top edge of the front block, and secure that with the other button.
Slip stitch the front edges together, as you would in needleturn applique.
You can hang the Penny Pocket by threading ribbon through the back fold-over.
Fill with sweet Penny Pocket with roses and hang!
You can download the ‘Christmas Roses’ stitchery design from my blog today.
Thank you Jenny…. I can’t wait to make your pretty penny pocket!
Please visit Jenny’s shop at ELEFANTZ where you’ll find beautiful pattern designs, recipes, freebies, tutorials, a weekly newsletter and there’s even a magazine you can sign up for.



I love that you are doing this–I need all the homemade ideas I can get. This is really pretty!
Lots more coming up next week Sandy so make sure you pop back for some ‘handmade’ inspiration 🙂
What a beautiful penny pocket. Jenny is so talented. All if her designs are amazeing.
I agree Tammy… she is one fabulous designer and I’m thrilled to have her as a guest poster this week on Simply Christmas.
Beautifully feminine and elegant – and with our favourite Tilda fabric! What more could a girl ask for?! Thank you Jenny for sharing this tute, and thank you also Kerryanne for running the very fabulous, Siimply Christmas event again this year! 🙂
Hello gorgeous Vikki, aren’t we indeed blessed to have Jenny sharing her fabulous penny pocket design on Simply Christmas. I bet this one is on your Christmas sewing list Vik.
Hugs,
Kerry xx
Thank you for sharing this lovely idea.
Toni xx
Isn’t it darling Toni. I hope to get started on one this week.
It’s a beautiful penny pocket!
It is gorgeous Kate and I feel blessed to have Jenny sharing her original design with my readers.