Hi creative friends,
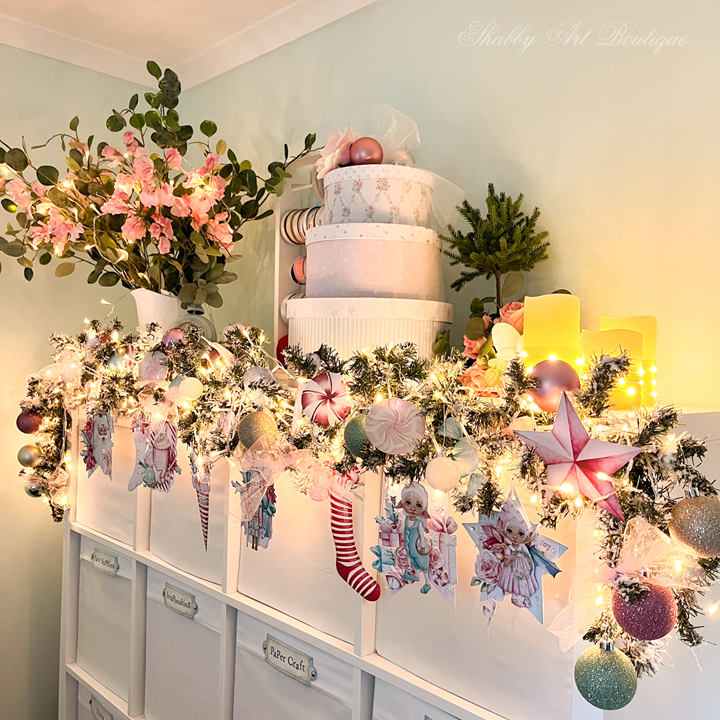
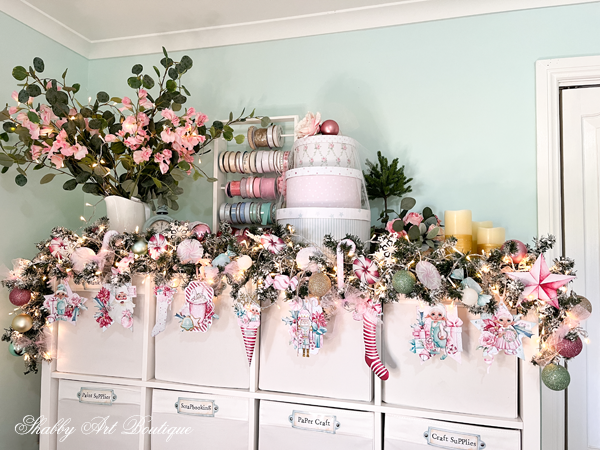
I couldn’t wait to use the new October Handmade Club kit, Sweet & Shabby Christmas this week when I started my Christmas decorating in the craft room.
My craft room is my work place, so I want it to look beautiful and Christmassy, while still remaining functional.
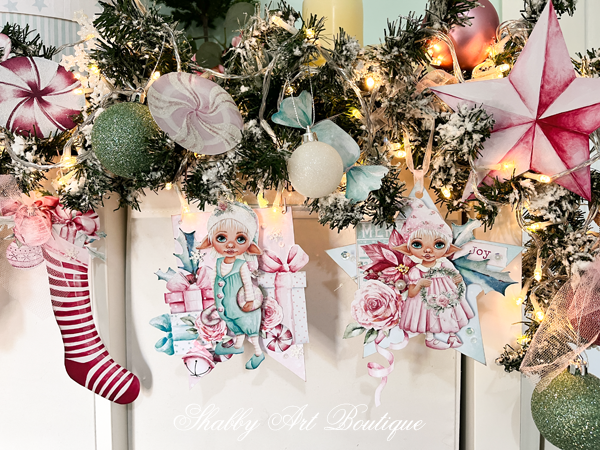
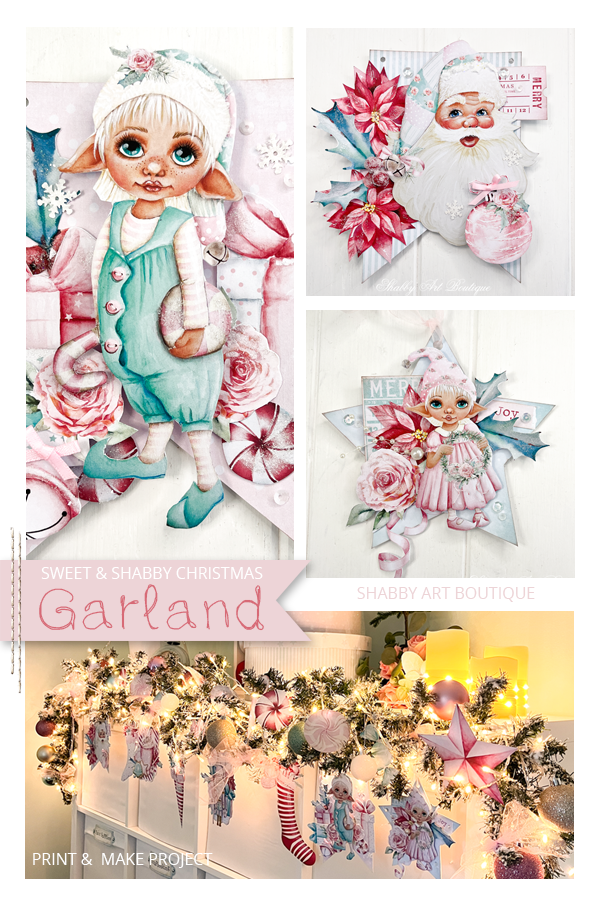
Decorating the top of my IKEA Kallax storage units is the perfect way to enjoy the season and still be able to get to all of my craft supplies, so I decided on a garland. I placed the least often used boxes at the very top of the storage unit, so that I won’t need to disturb the garland over the coming weeks.
I love how pretty the garland looks in the early evening…. it really is all aglow!
This post contains affiliate links – see my Disclosure Policy
How to make the Sweet & Shabby Christmas Garland
Materials
- 6′ or 180 cm garland – I used an inexpensive dollar/variety store garland.
- Faux flocking powder – I used Sno Flock
- String of warm white lights
- 600 gsm white cardboard
- Bonus printable from the October Handmade Club kit, Sweet & Shabby Christmas (available until 12th November, 2021)
- White glue and foam tape
- Normal crafting tools
- Extra decorations: baubles, glitter tulle etc.
Instructions
- I believe a lit garland is an easy way to add a touch of Christmas to any room and they are so versatile as a base for projects.
I used an inexpensive garland from a discount store. I didn’t mind that it was fairly sparse because I knew that I was going to be adding in lots of decorative elements.
As I love to use snowy flocked items in my decorating I decided to give this garland a quick and easy coating of faux snow flocking. I used this product from Amazon, but you may find it elsewhere.
The complete instructions are on the side of the bag, but basically, you spray the item with water and then sprinkle the snow on using a kitchen sieve. This is a simple process for 2 people, but I did this one on my own without any issues.
Tip: be sure to put a drop cloth down before working with Sno flock.
2. Once the faux snow is dry, hang the garland in place and carefully add the string lights.
People often ask does the faux snow come off and to be honest, I find that a small amount may flake off, but if handled with care the snow stays put…. even after storing during the year.
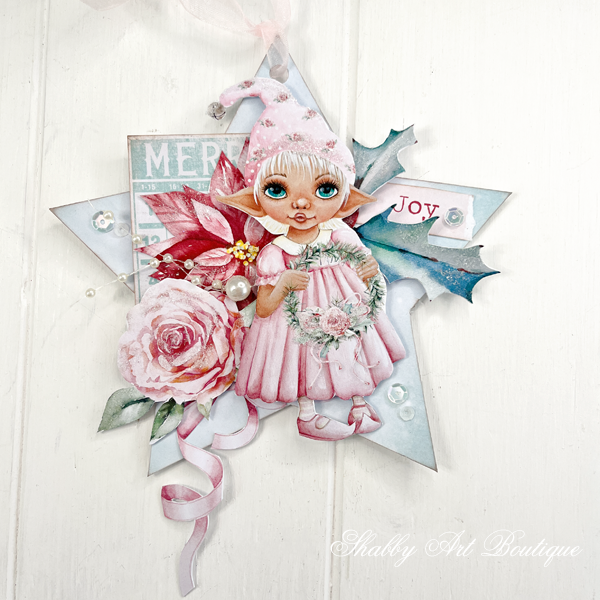
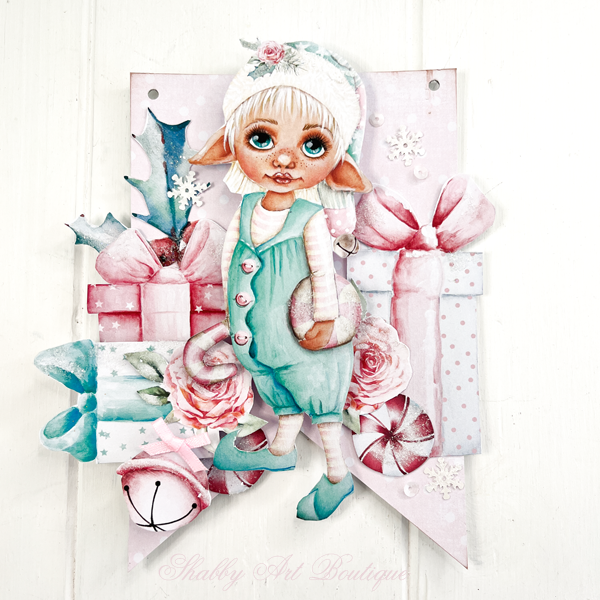
Making the banners for the garland
3. I’ve created a ‘Print & Make’ PDF file for this bonus kit project with each banner set up on an individual page. If you like what I’ve created, you can simply print the file on matte photo paper, using your best print settings. Alternatively, all of these graphics are in the Elements folder of the October kit, so you can create your own version.
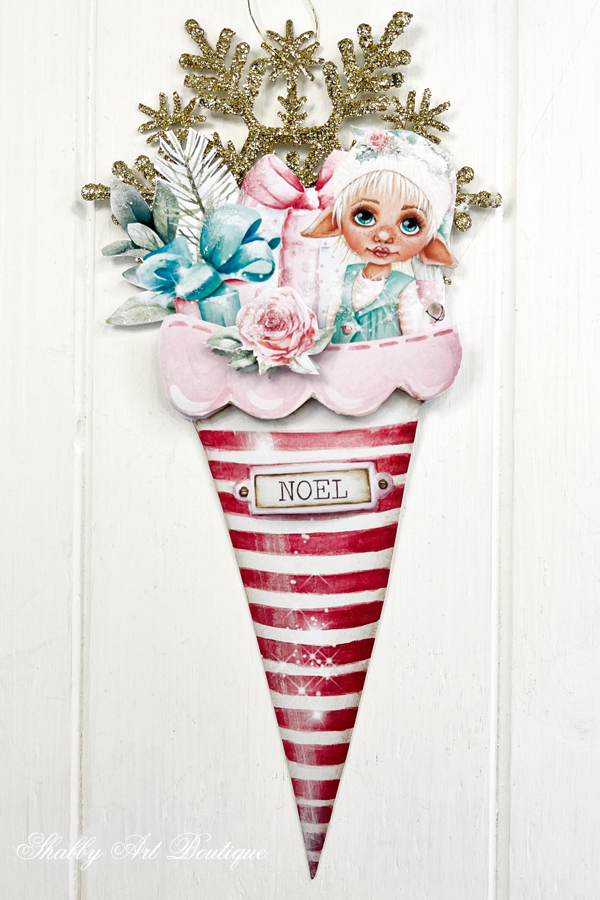
4. I adhered the banner bases to a heavier white cardstock to give them a solid base. To do this, I spread a thin layer of white glue over the entire base, making sure there were no lumps or air bubbles. Once they were dry, I cut them out with a sharp craft knife.
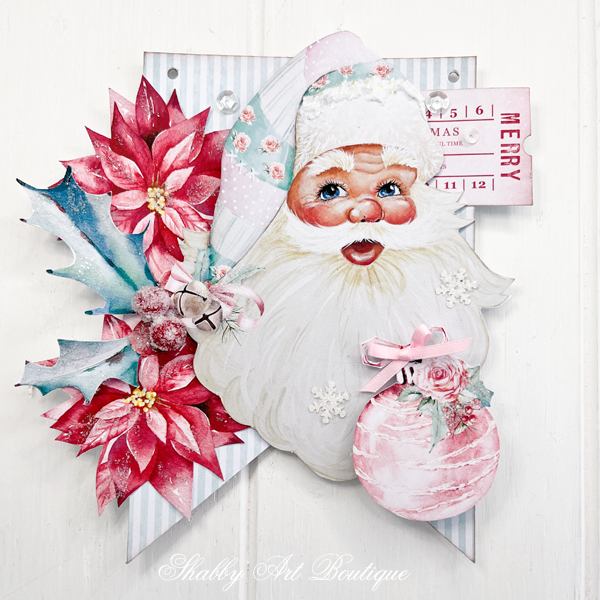
5. Using sharp scissors and my scalpel blade, I cut out the fussy-cut elements.
Before adding them to the banner base, I added a sprinkling of German Glass Glitter to various elements. You can also add more dimension by scoring the vein of the holly leaves and bending them into shape.

6. Plan your layouts. Using foam tape and white glue, build up your layers on the base, making sure to leave a space at the top to attach the banners to the garland.

7. Add in any extras like sequins, Snowtex, beads, ribbons, flowers etc.
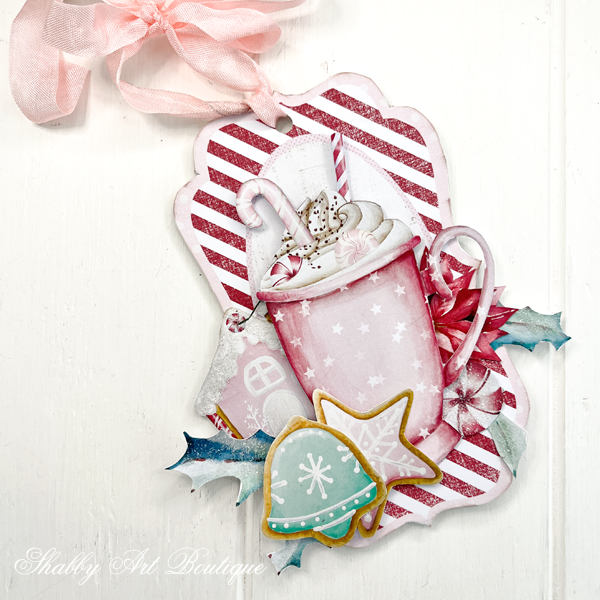
8. Hang the completed banners on your garland using either ribbon, pegs or paper clips.
9. Dress up the rest of your garland with baubles, ornaments or extra elements from the kit.

Tip: these layered banners would also make great tags for larger gifts.
To find out more about the October Handmade Club kit, Sweet & Shabby Christmas, please visit the club page.
PIN for later
Happy crafting friends!
Hugs
♥
Kerryanne
Let’s be friends on….


Get instant access to the free printables in my Newsletter Printables
Library by joining my email newsletter subscriber’s list.
I send out a weekly newsletters with updates on all things
‘shabbilicious’ at Shabby Art Boutique.
I invite you to join our fabulous and friendly
Facebook group – Simply Shabbilicious
where you’ll enjoy our friendly banter and inspirational creativity


Love to see this lit up! Puts me in a cozy, cheery mood.