I’m travelling again this week… and even though my frequent travels make life incredibly busy, there is an upside.
Waiting in airports and sitting on planes means I have spare time up my sleeve and I’m never one to waste any ‘ME’ time.
I’ve been reading and sewing and happily finishing off little projects on the go!

[pin for later]
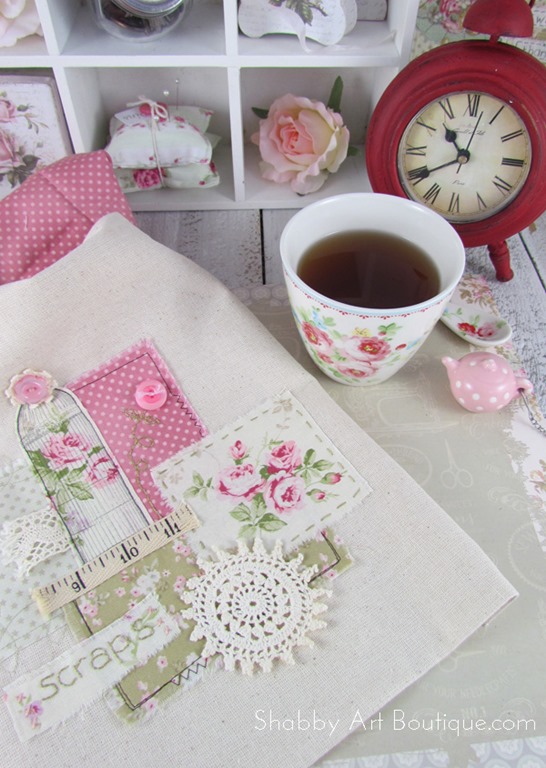
In an effort to travel light, I use a small sewing project bag to hold my sewing supplies while I’m away.
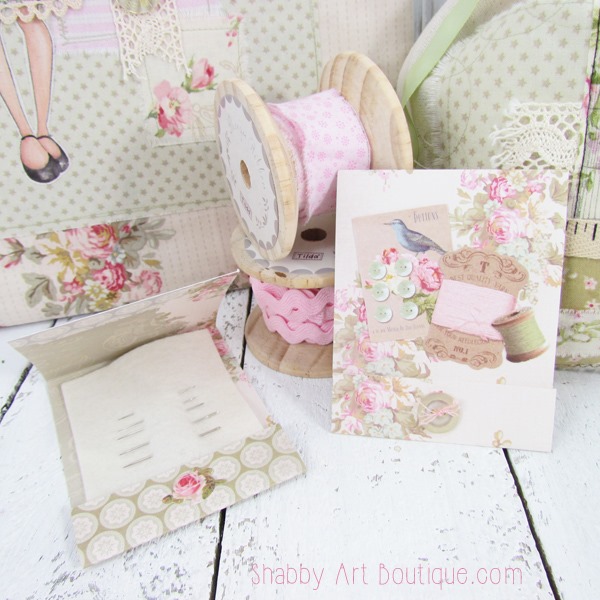
A simple matchbook style needle keeper seemed the perfect option for carrying sewing needles and pins and they are just so quick and easy to make.
I almost didn’t post these because I thought they were too simple… but then I thought maybe there are some people that have never made them and will appreciate this quick tutorial.
You can make the matchbooks any size you like, depending on how many needles you need to store.
The two needle keepers shown are 8cm wide x 10 cm high when closed. That is big enough to hold about 10 needles or 20 pins.
Requirements:
Pretty scrapbook paper, ruler and knife or paper trimmer, paper creaser or ball stylus, small piece of felt and a stapler.

Instructions:
1. Cut a piece of card 8 cm wide by 20.5 cm.
2. Measure down from the top 8 cm and make a folding crease using either a paper creaser, or like I do, use a stylus.
Measure up from the bottom 2.5 cm and crease again. Fold flaps over as in photo.
3. Cut a piece of felt 7 cm x 9.5 cm and insert under lover flap. Staple the flap down (in the centre of flap) to secure. The top flap will slip underneath the bottom flap to keep the matchbook closed.
Tip: I added a small rose sticker over the staple on my kitty matchbook and sewed a button onto the other matchbook.

Skill Level: beginner
Time: 10 – 15 minutes per matchbook.
If you would like a smaller matchbook, simply adjust the measurements.
The paper I’ve used for this project was from the Tilda Happiness is Homemade collection. This is without doubt my most favourite Tilda collection, but sadly it is soon to be retired. I still have a few items left in my shop, but I won’t be getting any new stock in this collection.

This is the bag I’m using for a sewing bag while travelling. I have a tutorial for how I made this scraps bag HERE.
Happy crafting
♥
Kerryanne
I’d love for you to connect with me at:


Follow on Bloglovin
or if you’d like my posts delivered directly to your Inbox
Subscribe to Shabby Art Boutique by Email
If you’d like a private pass to all things ‘shabbilicious, sign up today for my fortnightly newsletter. It contains personal stories, sneak peeks, recommendations, discounts and freebies.


Thank you KerryAnne, I am so so so happy that you published this tutorial. You know sometimes the simplestthings are the sweetest and most precious. I love this so very much. You always make the most beautiful things and to me they are right up my craft alley…and now I will just have to make these matchbooks for my needles. I just love shabby chic vintage. So sweet!!! Going to get things out to make them now.
also KerryAnne….HAPPY MOTHER’S DAY TO YOU!!! God bless you and I pray you have a wonderful week.
I’m glad now that I posted the little matchbook needle keepers too. I sometimes overlook sharing some of the simpler projects because I think they are too easy or perhaps everyone already knows how to do it, but you are right Ms Joey, these are sometimes the sweetest ones. Thank you xx
Gorgeous! I love your work and your blog!
Thank you Sheila…. how sweet of you! I’m thrilled to have you here too ?
Thanks! I would love to see what you carry in that pretty sewing bag.
Oh you will Gayle. It will no doubt pop up here on my blog when finished ?
Such pretty additions to any sewing basket Kerryanne – TFS.
Safe journey.
Toni xx
Thanks Toni ? We can never have too much pretty!! Hugs xxx
Thanks so much for sharing this. Simple so nice sometimes.
I have to agree Robin. Simple projects can be just as pretty as the more difficult ones. I’m glad you liked it. ?
Hi Kerryanne,
I visit regularly but don’t often comment; but I had to this time! I was so inspired by this post – I went home (after work) and created 5 of these needle keepers! : ) Thank you so much for sharing this great AND easy idea! Your blog is a continual source of encouragement to me. ~Karen O
Where did you get the cute teapot (tea diffuser)?