With pumpkin season almost upon us, it’s time to start crafting.
Pumpkins come in all shapes and sizes… but my favourite ones are a tad shabby and of course, are the homemade variety.
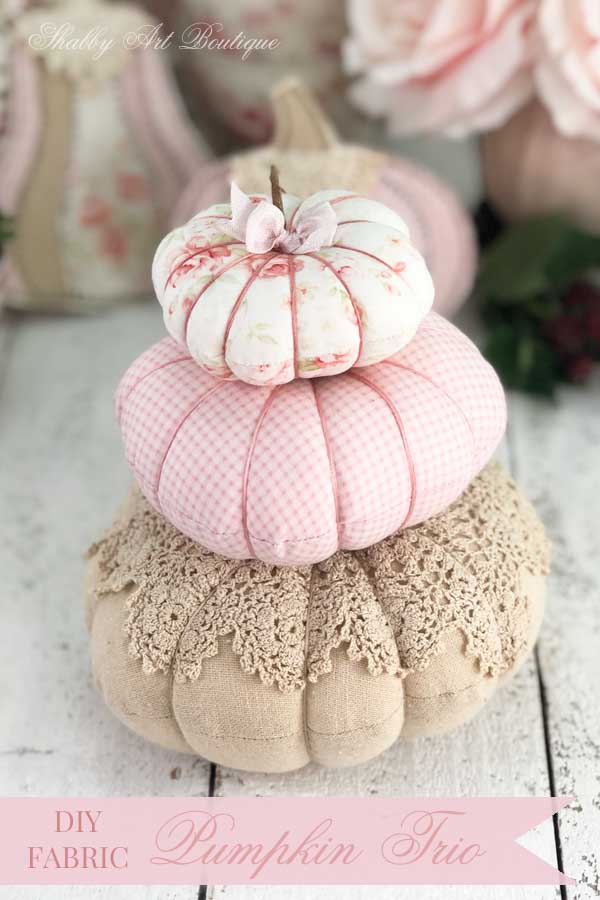
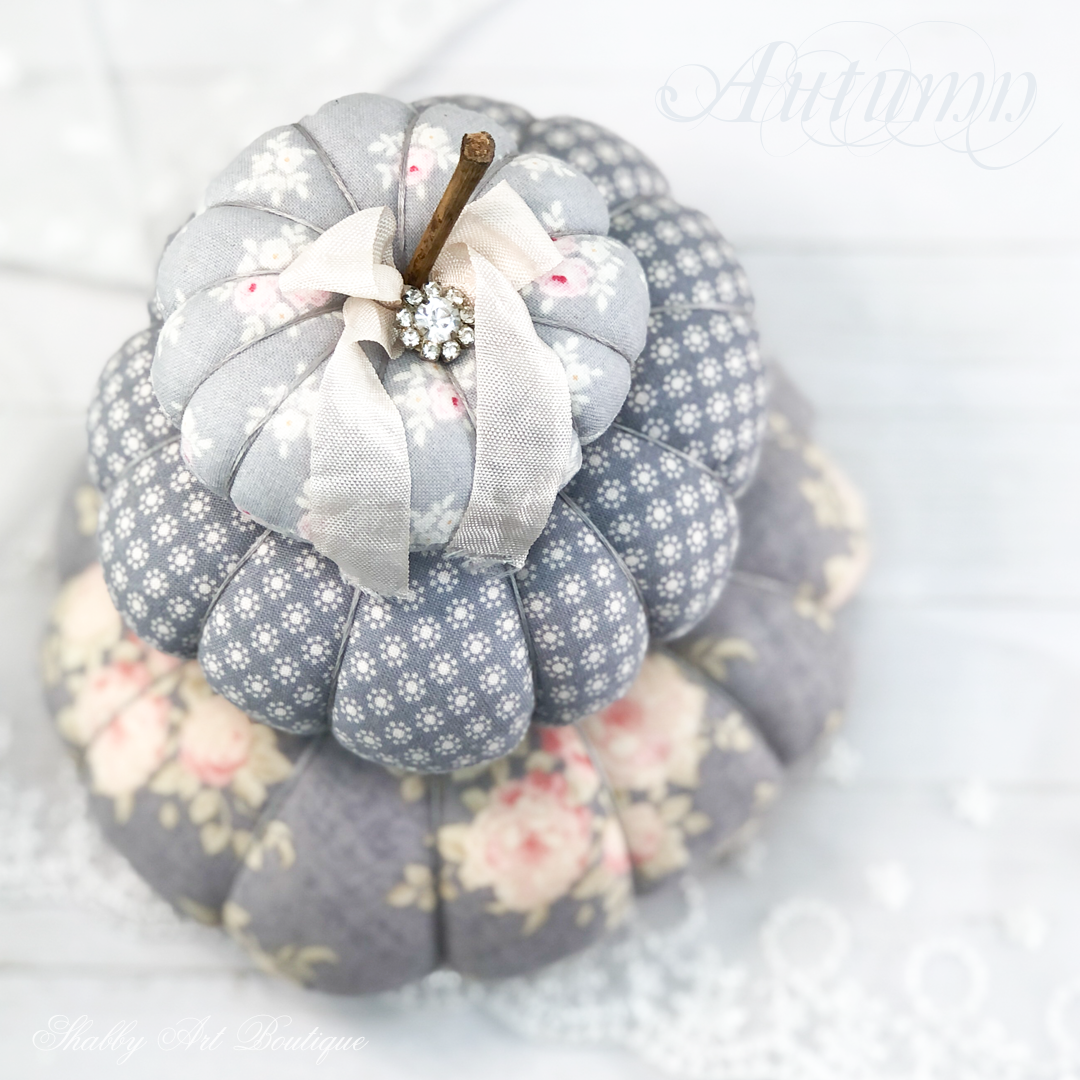
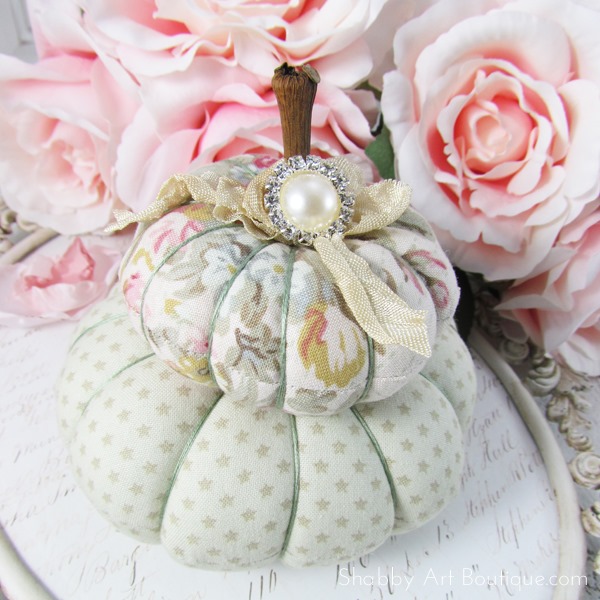
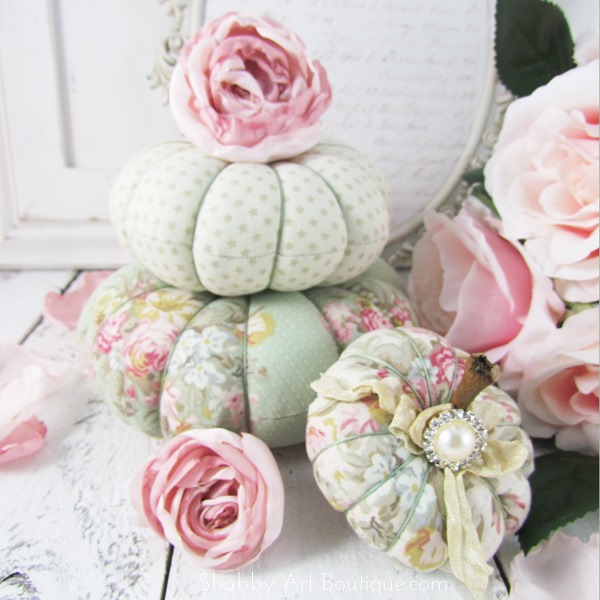
Today I am sharing how to make this sweet little pumpkin trio, but I warn you… these shabby little gems are the perfect size to tuck into Autumn vignettes, so you’ll want to make more the three!
[Pin for later]
Seasonally…. I’m a little confused, because I live between two worlds and multiple seasons!
As most of you know, I live in Australia, but what many people don’t realize is that the southern hemisphere has the opposite seasons to the northern hemisphere… so when it is summer in the US, it is winter in Australia.
The large majority of my blog readers are in the northern hemisphere, so I try to accommodate their needs as well. That means I’m usually creating for the opposite season to the one I’m living in…. hence the seasonal confusion!
So, as we are experiencing the first hints of our Spring, I’m enjoying the crafting delights of Autumn, or maybe you call it Fall.
For your convenience, I’ve supplied affiliate links to the products I used.
DIY – Shabby Fabric Pumpkins
Supplies:
3 x coordinating shabby fabrics,
DMC cotton,
Small stick and hot glue gun,
Cardboard and compass,
Sewing machine and sewing supplies.
Instructions:
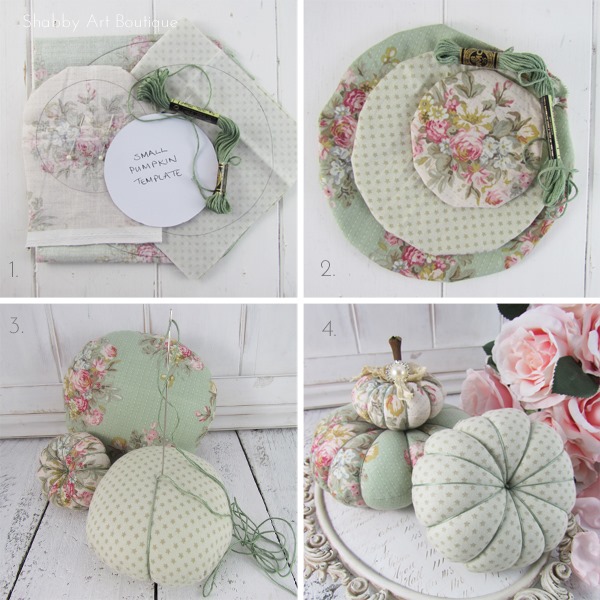
1. Make 3 cardboard circle templates using your compass. My circles had diameters of 9 cm, 13.5 cm and 17 cm, but you could make them any size.
2. Fold each of your fabrics in half, right sides facing, and trace around each circle. (diagram 1.)
3. Using the sewing machine, sew around each circle, leaving a small opening in the seam for turning through. Trim fabric excess and turn circle right side out. Press with iron. (diagram 2)
4. Stuff each pumpkin with fiberfill until you have a round ball. Using the large doll needle threaded with an extra large length of DMC cotton, insert needle in the center of the ball from top to bottom. Take thread around the outside and insert in same spot again. Pull cotton tight to make a dent. Continue making the same stitch until you have divided the ball in four equal parts. (diagram 3.)
5. Continue working around the ball, adding two more segments in each of the previously made quadrants. You will end up with 12 segments. Secure the last stitch with a knot. (diagram 4)
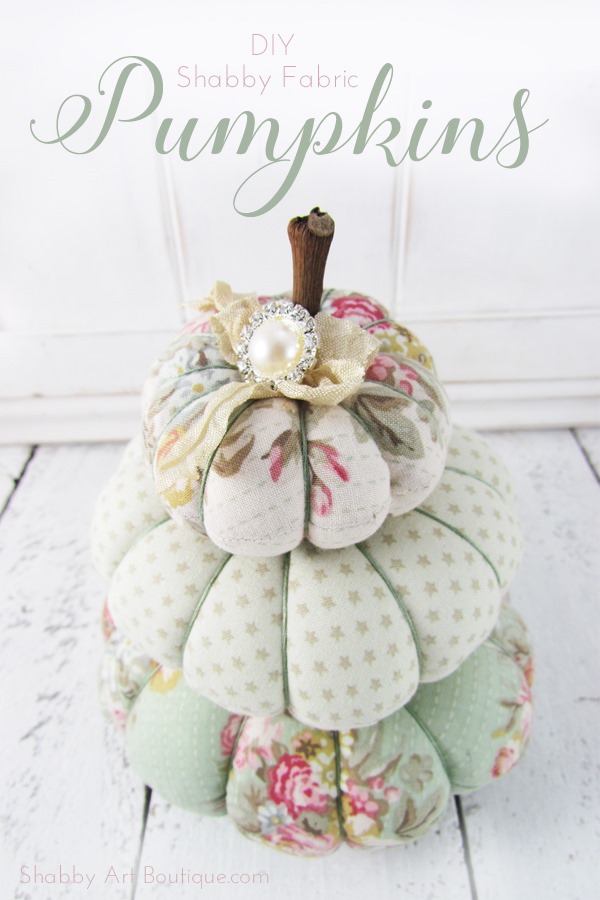
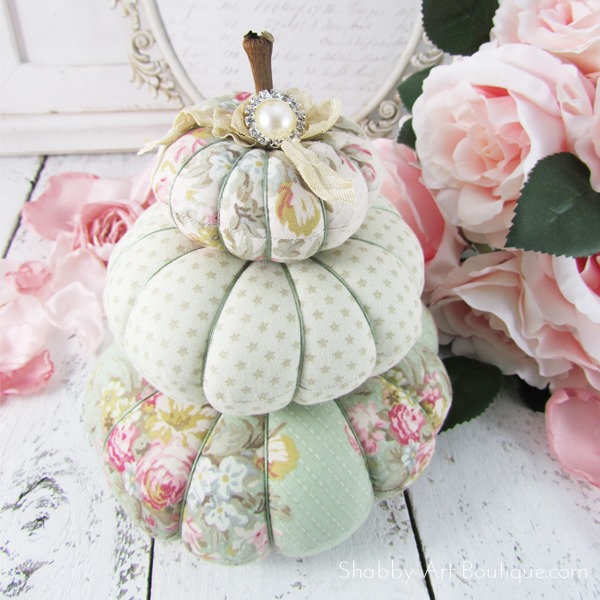
6. I embellished the smallest of the pumpkins by adding a small stick to the top with hot glue. Once dry, I tied a small bow with cream seam binding and added a pretty rhinestone button.
These were so quick and easy to make…. I couldn’t stop at just 3 fabric pumpkins, so expect to see these and a few other pretty pumpkins popping up in my Autumn vignettes.
Happy crafting friends!
Hugs
♥
Kerryanne
Let’s be friends on….
Get instant access to the free printables in my Newsletter Printables
Library by joining my email newsletter subscriber’s list.
I send out a weekly newsletters with updates on all things
‘shabbilicious’ at Shabby Art Boutique.
I invite you to join our fabulous and friendly
Facebook group – Simply Shabbilicious
where you’ll enjoy our friendly banter and inspirational creativity



So adorable!!!!!!!!! What a cute look, love this Kerryanne!
Wow, these are fabulous Kerryanne. I love Autumn and pumpkins are always a favourite.
Toni xx
These are so darling.. and of course, that beautiful fabric just MAKES THEM what they are…. shabby-delicious! I’m so glad you tune in to our seasons here in the US….. you always inspire me to want to come something that is seasonal for our seasons. These will be on my to do list very soon!
And I meant….. “make me want to “create” something”……. my laptop does not mind me sometimes! Sorry for the error…. Marilyn
I love those and thanks so much for your instructions I have some old vintage beaded dresses I am wanting to try and make a pumpkin for myself and din’t know for sure how to go about it so your instructions help a lot. I didn’t realize where you where ? and I have read your blog a long time?
so how cold does your winter get? below zero?
Hi Janice, winter where I live is not very cold. I live in a sub-tropical part of Australia with a temperate climate. Our year round temperatures are between 20c – 30c (69f – 86f), so we don’t even need jackets here. Interestingly, we don’t really have 4 seasons in my part of Australia either.
Wow, your pumpkins will look amazing made from beaded dresses. Please share them on Shabbilicious Friday when you are finished 🙂
Cute! Definitely going to try this. Thank you.
Really sweet! Never thought of making Pumpkins with floral fabric. Will be doing this. Thank you
ohboy are those precious, hope can do justice to them. Will look for some shabbilicious fabric so they’ll have correct feeling. Can hardly wait to see pumpkins made from beaded dresses, how incredible huh?
You know KerryAnne even if I’m not feeling very cheerful when I click on your posts my demeanor changes, am happy to see what you have in store for us, always something worth waiting for. Your blog has helped me more than I thought possible to be able to deal with death of our grandson, you are magic dear lady, thank you.. Was lucky person when I happened onto your blog.
Your weather sounds like San Diego in Spring and Fall altho when we lived there Fall was hotter than summer.. Enjoy your weekend
When you stack the pumpkins, do you glue them together? Your work is beautiful. thanks for the help.
Hi Kathleen, no I didn’t glue them together, but you definitely could. I don’t have any little children that would be tempted to play with them, so if you do you may want to hot glue them or even stitch them together. I only put a stem in the top pumpkin, so I could group mine as a trio, but I’ve made more pumpkins since using that pattern and they are single pumpkins all with stems. Hope this helps. 🙂
I love these Kerryanne! Thanks so much for the tutorial. I e had an accident and am off my feet for awhile so no furniture work. I will enjoy filling my time making a few of these.
Love your tutorials! Keep up the good work and keep them coming.
Ok I’m having a blonde moment reading this turtorial; for one pumpkin am I sewing two circles together to make one pumpkin? I don’t really understand that part.
Hi Jessica,
Yes, 2 circles form your pumpkin – each pumpkin has a seam around the circumference, which you can see in my main photo. I refer to point #2, ‘Fold each of your fabrics in half, right sides facing, and trace around each circle’…. so you have a piece of fabric folded right sides together, which will form the top and bottom halves of the pumpkin. Trace around a circle pumpkin template on your fabric and sew around circle (point #3).
Hope this helps 🙂
Hi Kerryanne!
I saw these when they were posting around Pinterest last year (2016) and they are part of what inspired me to create mine! I ended up making 31 soft toile pumpkins and gave them to all my coworkers, the office at our school, and all the friends I made at the campground we were fortunate to live at for a year. Yours are ADORABLE!!! Making more this year. 🙂
Happily seasonally confused a bit, too {working on Christmas stuff},
Barb 🙂
Back again, Kerryanne,
I posted over to my French Ethereal page to share with my readers since it’s that lovely almost pumpkin time of year! Thanks for a fun tutorial!!! Still looking for your angel tutorial {or is she for sale as a pattern??}. Thanks!
xoxo Barb 🙂
Hi Barb,
The Pincushion Angel pattern is available on the actual post, where is says ‘Download the free E-pattern HERE’. It’s a link that you click on to access the pdf pattern file.
I’ve put a direct link here for you for the pattern: http://www.shabbyartboutique.com/wp-content/uploads/2017/08/Pincushion-Angel-by-Shabby-Art-Boutique.pdf
Happy crafting,
Kerryanne
Once again am so appreciative of subscribing to your so special blog KerryAnne. You continue to delight me every post. Such wonderful projects you share with us all.
I finally got my new sewing machine going to make some bedroom and master bath curtains today. About time,,,have had new sewing machine for over a year I think but had barely used it. After our grandson died I just couldn’t seem to get interested in doing much of anything creatively.
Guess was depressed more than usual . I suffer from depression and anxiety, take meds but some things happen to push me further into depression for while. The circumstances .of Grandsons death were so compelling related to our family just bowled me over for quite a while. Think am finally coming out of my fog to create again. Looking forward to making the rabbits and this pin cushion and your Fall projects. My nice new sewing machine will come in so handily. Will be great to get back to sewing again.
Thank you again for sharing so much with us. I treasure “knowing” you. Happy weekend
Hi, could you tell me a place to possibly buy shabby chic fabrics in the states? Having trouble finding 3 coordinating pieces.
Hi Dale,
Any patchwork and quilting store will have co-ordinating fabric collections, but you could definitely find something lovely at these 2 US based online stores:
Shabby Fabrics – https://www.shabbyfabrics.com/
Fat Quarter Shop – https://www.fatquartershop.com/
Hope you have fun making pumpkins!
Kerryanne