Hi creative friends,
It’s been such fun working on some brighter, bolder projects this past week with the new Fabulously Retro digital kit.
I have a larger project to share with you later this week, but first I wanted to share a free printable project with you that I made to include in the larger project.
I’m sure you’ve seen matchbook projects before… I shared this matchbook needle keepers project about 6 years ago.
One of the ladies in our Facebook group Simply Shabbilicious, used that project to make matchbook notebooks with the Handmade Club Christmas kit and it was the perfect project for gift giving at Christmas.
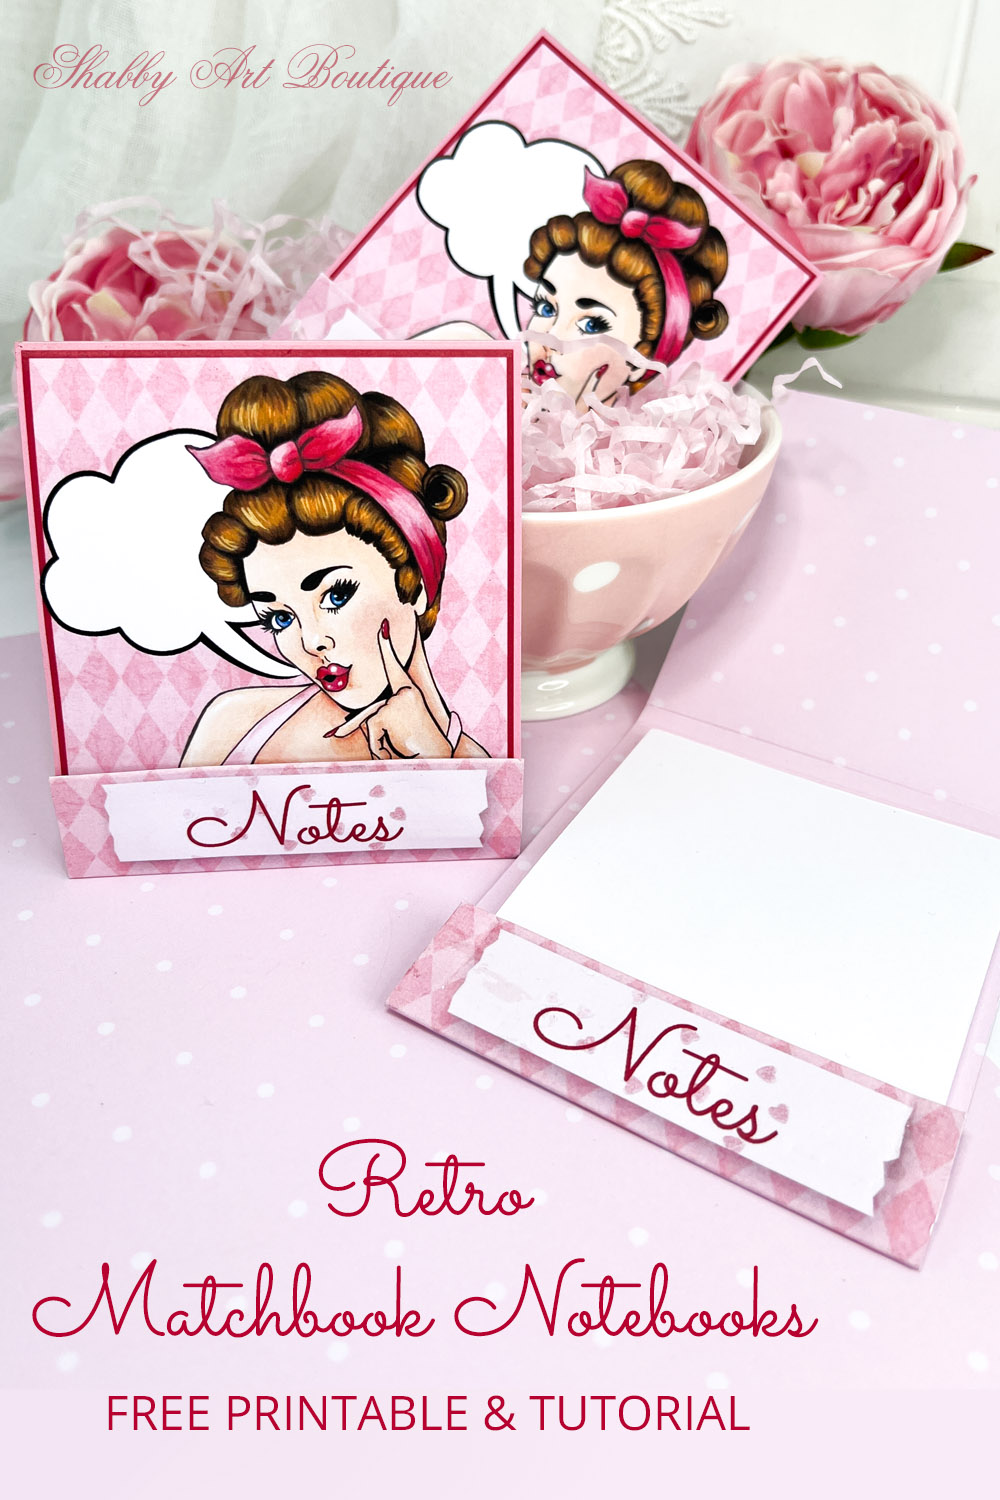
Today I’ve taken that project a step further and made a larger sized matchbook notebook with hidden staple.
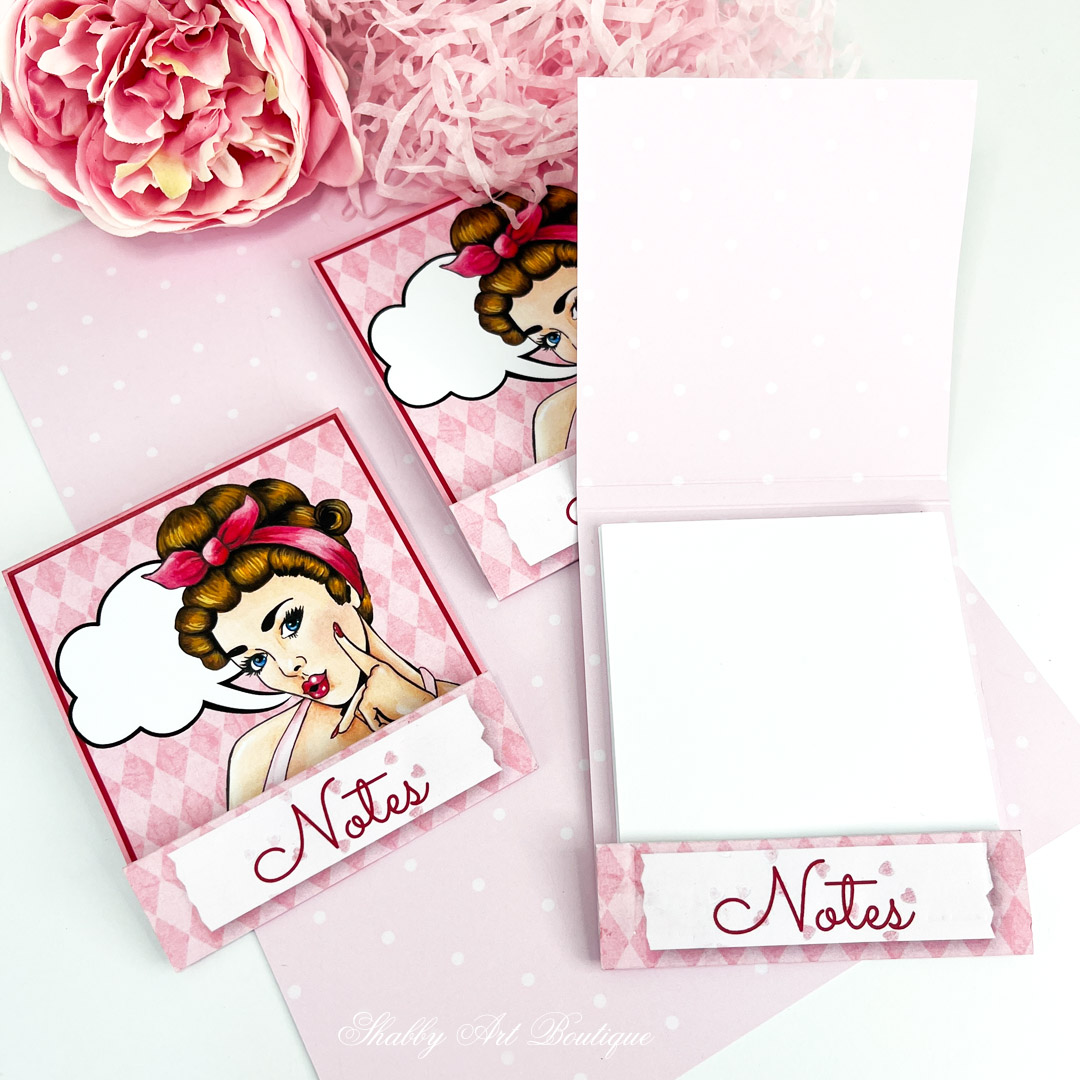
Retro Matchbook Notebooks
Materials:
- Free printable – download below
- Scissors, or Knife & metal ruler, or paper trimmer
- Score board and bone folder or stylus
- Glue – white and clear
- Stapler
- 1 x sheet of cardstock weight matte photo paper and several pages of plain copy paper.
Download:
This free Retro Matchbook Notebook printable is provided as ‘For Personal Use Only’ under my copyright, which means that you cannot sell this design as a digital or finished item. Please enjoy using this printable to make notebooks for yourself or as gifts for family and friends .
Click here —> to download the A4 Retro Matchbook Notebook printable PDF
Click here —> to download the Letter (USA) Retro Matchbook Notebook printable PDF
Instructions:
- Print the first page of the printable file on matte photo paper (cardstock weight). A backing paper has been supplied to print on the back of this page. Cut out the design.
- Score the 4 lines where indicated on the printable.
- Fold the matchbook into shape.
- Cut the copy paper to fit inside the matchbook – I cut mine to 8 cm x 9 cm (3 1/4″ x 3 1/2″) and made 6 cut-outs from an A4 page. I used 12 papers in my notebook. Compile your note papers into a neat pile and line up at the top of your matchbook outer cover. Hold securely in place with paper or bulldog clips while you staple in the centre.
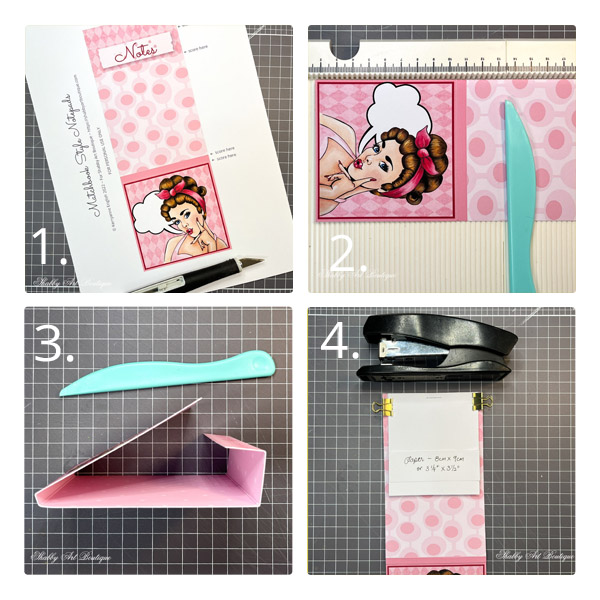
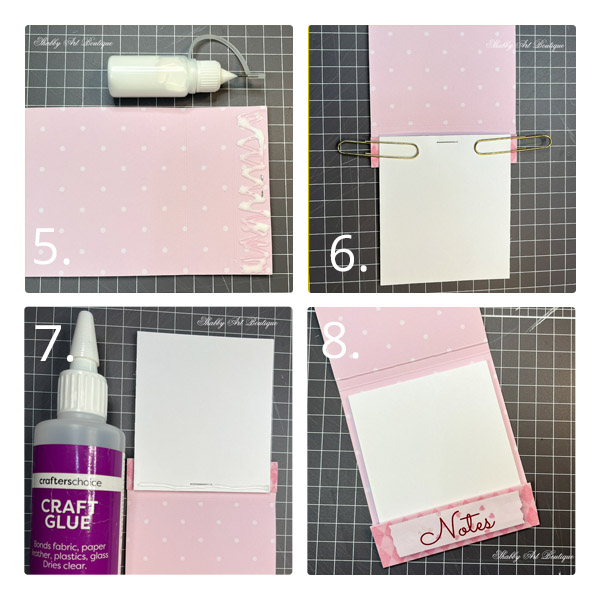
5. Turn the matchbook over and add white paper glue to the first section at the top of your printed matchbook (over the staple).
6. Fold that section over and hold in place while it dries. I know this looks a little strange at this stage, but the note paper will end up in the right place in the next steps.
7. Apply a bead of stronger clear glue along the top edge or your note paper (across the staple).
8. Fold this section over again, so that the paper ends up in place inside the matchbook. You may need to straighten the paper slightly to ensure it is centred and then secure with something like paper clips or a heavy item while the glue dries.
Now that your matchbook style notebook is completed, the top cover will tuck easily into the ‘Notes’ base at the bottom of your matchbook.
This is such a quick and easy project that you can make in a matter of minutes.
What a perfect gift to tuck into a card. It would be perfect to pop into your handbag…. or include in a junk journal. You could even add a few words in the speech bubble!
I hope you enjoy making this quick and easy project.
This design was created using my latest kit, Fabulously Retro, which is available to purchase on Etsy in Letter (USA) size and in A4 size.
Click here to see what is included in the kit.
Pin for later.
Happy crafting!
Hugs
♥
Kerryanne
Let’s be friends on….
Get instant access to the free printables in my Newsletter Printables
Library by joining my email newsletter subscriber’s list.
I send out a weekly newsletters with updates on all things
‘shabbilicious’ at Shabby Art Boutique.
I invite you to join our fabulous and friendly
Facebook group – Simply Shabbilicious
where you’ll enjoy our friendly banter and inspirational creativity.


This is adorable and would be so cute as an added small gift(s) when added to a personal gift basket or just as a trinket gift. Thank you so much. I love how your mind works.
Wow this is so cute
You are making it hard for me to resist joining the club only cause I have a quite a few projects to finish, im a great beginner but not a good finishing 🤫
🤔soon I will come check it out again thank you so much the freebees are scrumptious and Ive been using them
Cheers from Toowoomba 🌺