It’s a good feeling when a DIY project comes together as you visualized and within budget.
I’ve never tackled a complete kitchen make-over before and this one was on an ultra tight budget too.
We have the unique situation with our home, in that it is part of our business, so when we sell the business the home goes with it. This means that our home’s value is unlikely to rise, so we have to be mindful of not over capitalising.
So… this was a careful consideration when we decided how to tackle this make-over.
Our townhouse is 20+ years old and our home is the one thing at the resort that has never been updated.
The kitchen had original 80’s fittings that had seen far better days. The cupboards were a pale green laminate that had chipped and peeled in several places.
The hot plates, overhead exhaust fan and spot lights needed replacing, so this was the first priority.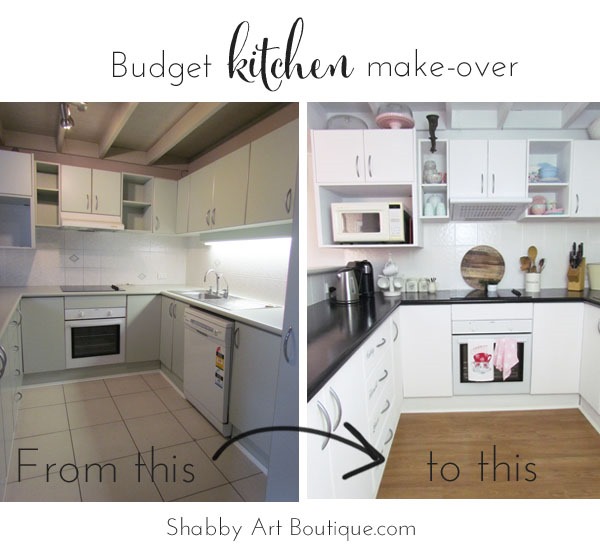
Next step was doing something with the wall and floor tiles.
I tried everything to clean the grout in the wall tiles, with little success. The floor tiles had many chips and cracks in them, so were becoming unsightly.
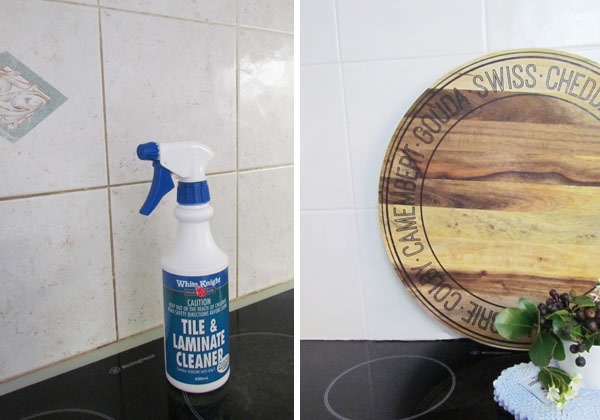
Some professional advice suggested I try the White Knight Tile and Laminate Cleaner.
It was fabulous… and I was able to use the one product for both the tiles and the kitchen cupboards.
With the wall tiles cleaned, I primed them with a tile undercoat, before painting with 2 coats of a White Knight gloss white tile paint. Each coat was applied after a 24 hour drying period.
The result was instantly amazing. Just that one step completely changed the whole look of the kitchen. Even better, 6 months on and not one chip or mark on the painted surface, plus food splatters are easily removed with a damp cloth. I couldn’t be happier with the outcome.
A lot of thought was given to the floors (like several months) and in the end, we continued the timber flooring from the rest of the house into the kitchen. It was laid directly over the tile floor, with a slight step down into the adjoining breakfast nook.
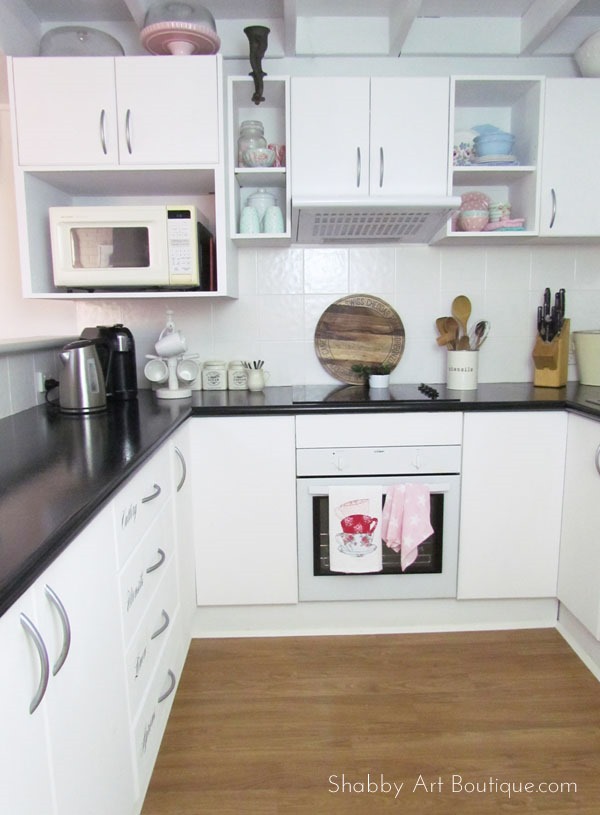
The ceilings and walls were painted in white low sheen acrylic (latex) paint and the kitchen cabinets and pantry were painted with 3 coats of Annie Sloan Pure White Chalk Paint.
The kitchen is absolutely pocket sized and there’s no direct window, although, there is a large opening above the bench that looks down into our living area. Without a window, the kitchen tends to be dark and dingy. By painting all the surfaces white, it brightened the room and also added the illusion of extra height for the ceiling.
Originally I considered black handles for the cupboards, but as this was a budget make-over we decided to stick with the still functional matt silver handles from the old kitchen.
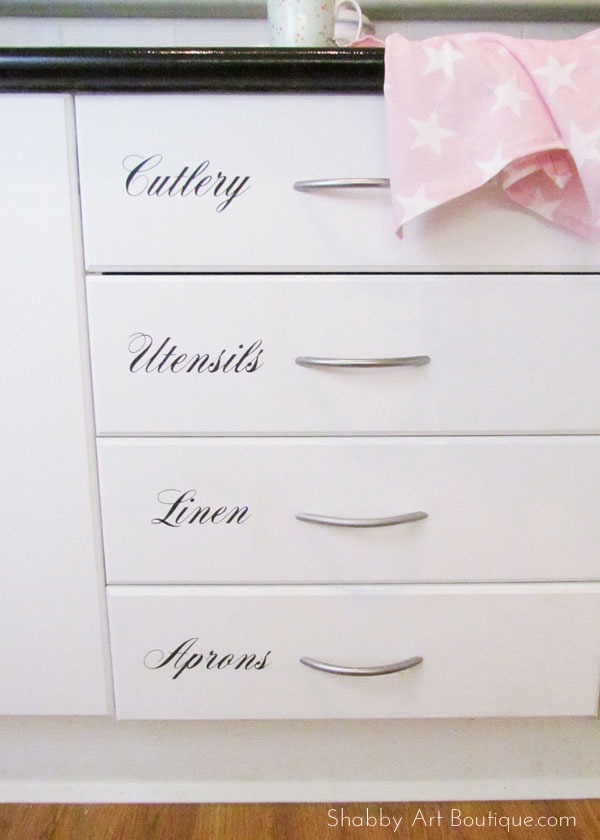
The cupboard doors are completely flat… which adds very little interest to the kitchen, so I added my own creative touch to the 4 drawers.
For the lettering, I made a stencil with my Silhouette and stenciled the words on in black paint. The lettering could easily have been hand lettered too, or cut from vinyl. I kind of liked the soft muted look of the stenciled technique.
I guess one of the positives of having an all white, fairly plain kitchen is the ability to dress it up with accessories.
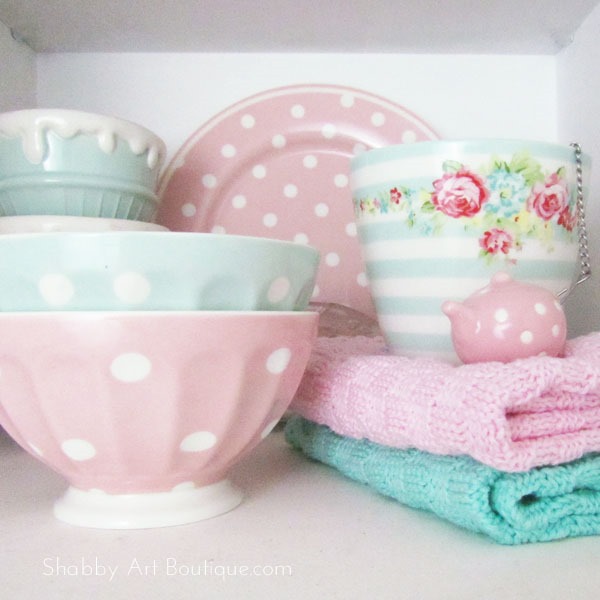
Right now I’m loving touches of pastel GreenGate…
But you might remember my red and white décor at Christmas.
Over the past few months my kitchen has changed her look several numerous times, from pastel cottage, to vintage and even farmhouse.
The neutral backdrop is really appealing to the decorator in me!!
You can see stage 2 of the make-over HERE. I think you’ll be surprised with one of the products I used.
Hugs ~ Kerryanne
I’d love for you to connect with me at:
Follow on Bloglovin
or if you’d like my posts delivered directly to your Inbox





Lovely makeover. My kitchen is a similar style and this is giving me some great ideas. Can’t wIt to see part two.
I’m so glad that I can offer some inspiration for you Gwyn. It really was quite cheap and simple to do. Good luck with your make-over too. 🙂
So cute Kerryanne! I love the drawers!!! Your kitchen looks very pretty.
xo
Thanks Anne. The drawers are certainly a bit of fun and no excuses now for things not being put away in the right drawers!! I appreciate you popping in to check out my make-over xx
So pretty Kerryanne. Love the drawers how cute it that. Nice job very sweet.
Kris
Aww… thanks Kris. I think it may well be one of the smallest ever kitchens, but now she is shabby white, I think I can live with it for awhile. Thanks for stoping by my friend 🙂
Your budget makeover looks fantastic! Love how it turned out… I`m thinking about painting our kitchen tiles too, but I don`t think I have the courage to do it 🙂 Alexandra
I was like you Alexandra. I kept thinking about what if it doesn’t look good or the paint chips off and then I’ll have to do a costly retile. But honestly, I was guided by this amazing paint specialist at our local hardware. She really knows her products and was a big fan of the tile paint. I’m glad I took the risk because the change is incredible. It’s hard to pick it up in the photos and with the difficult lighting and room size in there, but they look just like real gloss white tiles you would have laid. Let me know if you do paint them. I’d love to see your results 🙂
Absolutely wonderful. You can change the look so readily. I look forward to seasonal changes. Great job and I am envious.
Thank you Penny. I think it should provide a good base for my constant need for re-decorating 😉
So fresh and so you. It’s such a delight and I can just see you in there apron a’donned, decorating cookies and living the shabby life. 🙂
Ahh… you know me too well Mary. Thanks for stopping by and checking out my new kitchen xxx
I love the white base you have created for your varying colour schemes and those drawers look fabulous.
Toni xx
Thanks Toni. The black bench top was a huge stretch for this all white girl, but I know now that it is actually very serviceable. Black may just be growing on me 😉
Hugs ~ Kerryanne xx
so cute! it looks bright and cheerful now:) i really love the stenciling on the drawers, too!
Thanks Lynn 🙂
The drawers were one of those projects done on a whim. I think my hubby was a little worried at first, but he keeps telling me now how much he likes it…. oh he of little faith!! lol
Thanks for stopping by xx
Your kitchen is a lot like ours Kerryanne. We did a similar budget makeover by painting the cabinets and bench top. Your tiles came up great. Such a huge difference. I’ve thought of doing ours as they are a strange grey sort of colour, but that tile paint is expensive. I’ll live with it for now. Can I ask where you got the Annie Sloan paint? Great makeover! x Julie
Hi Julie,
I get my Annie Sloan online from Crab Apple Vintage. The tile paint actually goes a very long way. It’s kind of thick and quite opaque, so 2 coats is ample. I purchased a 1 litre can and still have half a can left over. I’m pleased about that, just in case I ever need to do any touch ups… but honestly, it has not chipped or cracked in 6 months. I painted each coat just before going to bed each night, so that it would dry undisturbed from dust or particles and it was always touch dry by morning. Thanks for your feedback. K xx
I really enjoyed your make over. My kitchen is very similar, I love the ideas of labeling the drawers and a white kitchen is so easy to switch in and out with the seasons. 🙂 Jo
im surprised you didn’t use the fabulos rustolium spray paint to paint the handles, a can costs about $4.00 and the results and wear is amazing !
Good idea…I may just do that. There’s still a few jobs to do in the kitchen before it is complete; I’m currently refinishing the inside of the cabinets. 🙂
Very pretty! If you couldn’t see the texture in the tile, you would think it was replaced!
I know Su… I really didn’t expect the finish to be as good as it is, The adhesion to the old tiles is amazing. I had to repair a couple of cracked and chipped tiles and you can’t even see which ones they were now. It was a much quicker, easier and cheaper option for our situation. 🙂
Where did you get the tile cleaner?
I live in Australia, so I got the tile cleaner from one of our bigger hardware stores, Bunnings Warehouse. Hope this helps 🙂
Hi Kerryanne,
This is my first time to link up to your linky party. So glad I did…………..and thanks for hosting!
Your kitchen came out so well, I love white……….and what a great backdrop for changing up things as often as you like with different colors.
Love that Idea…………..also loved the way you stenciled the drawers that looks fabulous.
Great job, and know you must really be enjoying all the cheery brightness of your new kitchen. Gotta go see the other post now.
blessings, Nellie
Well I’m so glad you did too Nellie. I look forward to you being a regular here at Shabbilicious Friday 🙂
It looks so fresh and updated! Love the words you added to the drawer fronts too, and the tile looks brand new. Lovely! XO
Kerryanne,
1st, I want to thank you for all your wonderful, kind, and creative ideas and projects you share. Your generosity and talent seem boundless.
My kitchen is about the size of yours only shorter. I love what you have done. Where do you buy the White Knight products? Do you think the tile paint would work on my ceramic floor tile? like yours is chipped in many places and looks dirty, but I like it and really difficult to replace.
Thank you again for sharing!
Margaret
Hi Margaret,
Thank you for your very kind comments. I purchased the White Knight products from Bunnings Warehouse, which is a large hardware chain here in Australia. White knight also produce a specialty tile paint. I’ve used that too with varying results. I think the key is to really prepare well with the prep/primer coat first. I’m sure if you visit your local hardware supplier, they’ll have an equivalent product. Good luck 🙂
What type flooring is it that you were able to lay over the tile? Is it would, vinyl, tile? Thanks. Great results.
Hi Cindy, we used wood with an underlay straight over the tiles. It worked out perfectly. 🙂