I accidentally stumbled upon a theme for my family room this year.
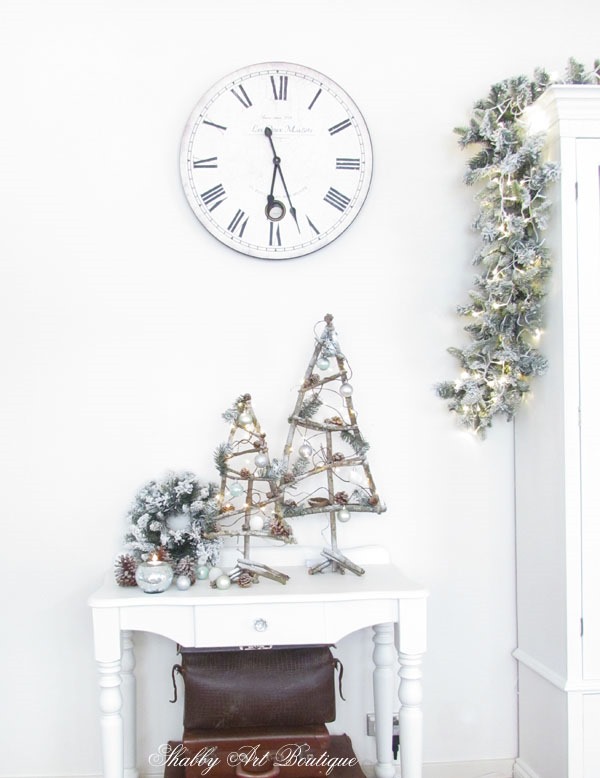
It started when I set up my snowy flocked Christmas trees and garland a few weeks ago. They sat there bare and unadorned, except for a single strand of lights. I really liked the parred back look… it was simple and kind of calming.
Next came a big bag of pinecones collected in the reserve at the rear of our home. They were destined to be given the ‘iced’ look and they too joined the simple forest starting to grow in my family room.
It’s verging on summer where I live and already very hot here at the tropical top half of Australia.
Keeping it simple and a little snowy feels cool…. unlike all the red in the other parts of the house.
I’ve kept my Christmas trees bare and started adding all handmade elements to this room.
Then on my very early morning walk (before the heat of the day) I noticed some fallen tree branches and an idea formed… in keeping with my natural theme, I needed a branch and twig tree, so home I came with an arm load of branches and twigs…. much to my husbands horror. I’m sure he was nervous about what would result from this new craft supply, but he needn’t have worried.
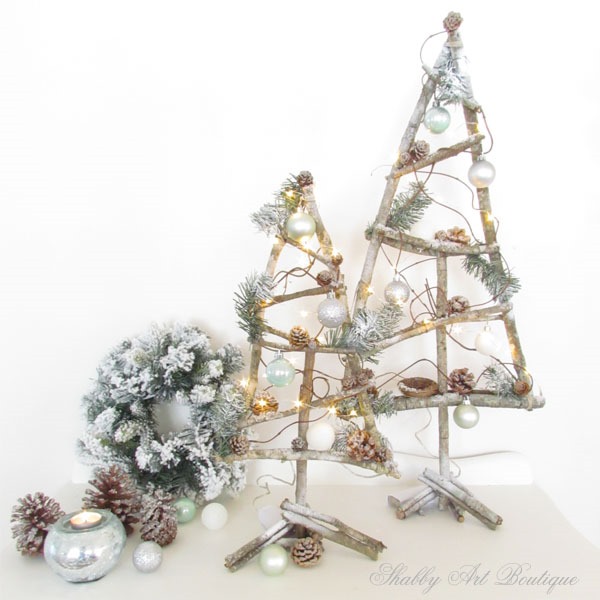
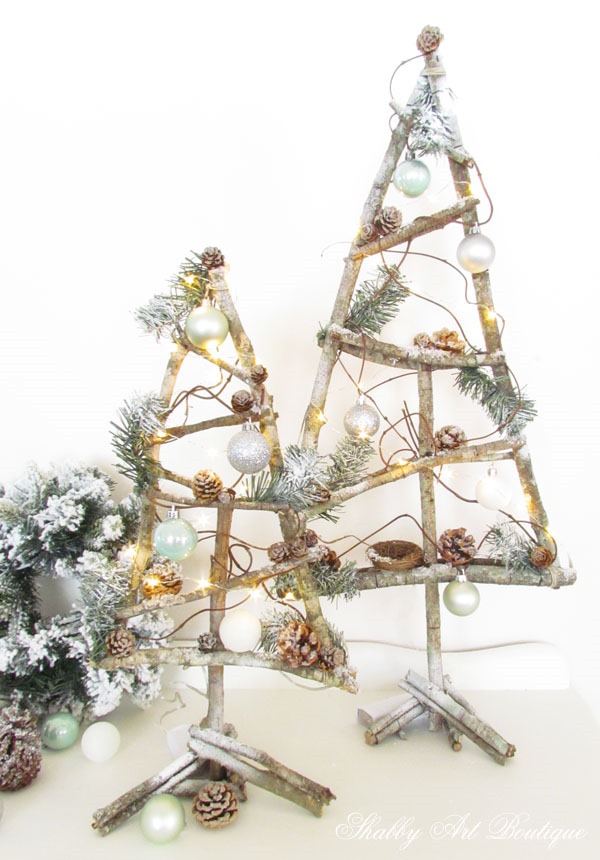
After an afternoon of sawing and hot glue-ing…. flocking and decorating… I had more natural trees to add to my forest… And I LOVE them!!
[PIN for later]
How to make branch trees
Materials
- A collection of branches, trigs and dried vine
- Small hand saw
- Hot glue gun
- Faux greenery
- Can of Santa Snow, Epsom Salt or glitter for snow effect
- Small pinecones
- Small baubles (optional)
Note: This is a fun project. There are no dimensions or plans; just cut and glue and aim for a triangular shape.
Instructions
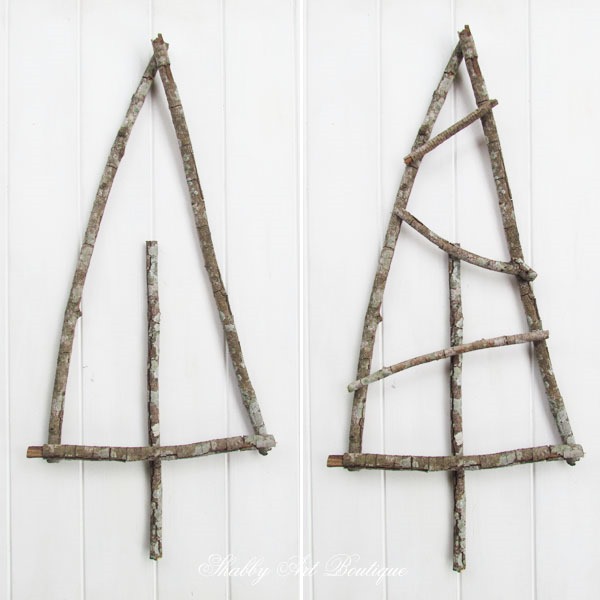
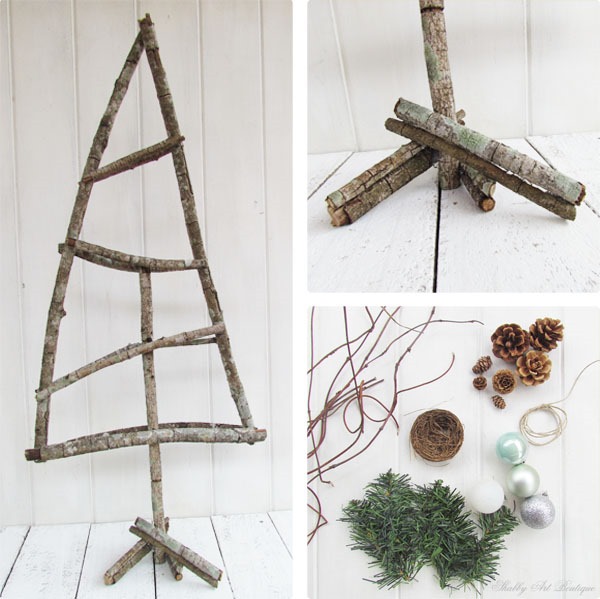
1. Saw your branches up to make a triangular shape and extra pieces for the cross branches. As a guide, my horizontal branch at the bottom of tree is half the length of the two side branches. Then I cut or snapped the remaining horizontal branches to fit…. see how easy this is!
2. I cut another branch for the main trunk of the tree approximately 3/4 the length of the side branch of the tree e.g. side branches 40 cm, base branch 20 cm and trunk 30 cm. It is sandwiched between the horizontal branches.
3. Next, lay out all your pieces on a table to make sure you are happy with the layout and sizing, before gluing in place using a hot glue gun. Glue one side first, then flip over and glue the twigs on the second side.I actually used a little twine to reinforce the main shape of the tree.
4. Making the trunk supports – see photo. I used a variety of smaller branches/twigs to form 3 supports for the base of the trunk. This step was made easier having an extra person to hold the tree upright while you play around with hot glue and the twigs to get them just right.
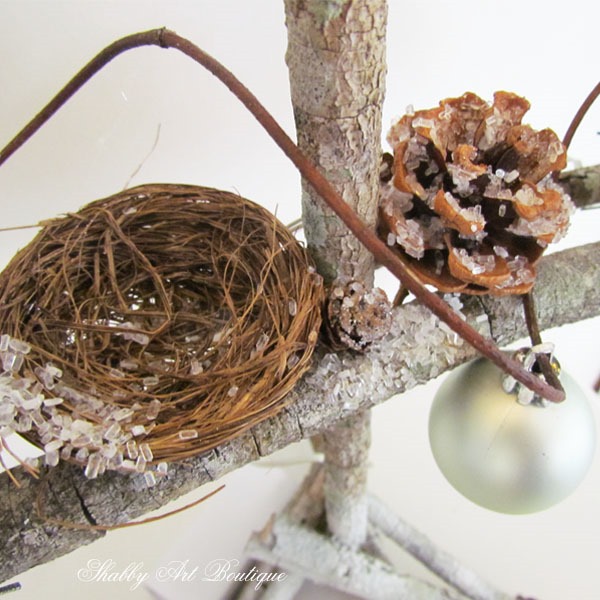
5. When my tree was completed, I decorated with a pieces of dried vine, pieces of artificial greenery, pinecones and baubles.
6. The last thing I did was wind a small set of battery operated lights around my tree. To hide the battery pack I wrapped a piece of white paper around the pack like a sleeve that could be slid on and off. Alternatively, you could make a small linen or burlap bag for the battery pack, that would be quite in keeping with the natural look.
This is quite a different look for me, but I’m enjoying the serene feel in this room…. and don’t worry, I haven’t abandoned my shabby/cottage Christmas altogether. I’ll be sharing more of my house next week in the bHome for the Holidays Christmas Tour.
Stay with me, because below is a fabulous ‘Creative Christmas Link Party’ from my Blogging 50 tribe. There will be lots there to inspire you!!
Happy festive crafting,
♥
Kerryanne
I’d love for you to connect with me at:
Follow on Bloglovin
or if you’d like my posts delivered directly to your Inbox
Subscribe to Shabby Art Boutique by Email
If you’d like a private pass to all things ‘shabbilicious, sign up today for my fortnightly newsletter.
It contains personal stories, sneak peeks, recommendations, discounts and freebies.
Please visit all of the talented bloggers below!




We think alike..:) I love how your adorable trees came out. I too used branches! The lights are the perfect added touch. I truly found working with branches was not easy for me. You made it look simple. Maria
Thank you Maria. It’s almost summer here and very hot, so my branches and twigs were completely dried out… maybe that’s the difference. Some of my branches just snapped and I didn’t even need to cut them with the saw. I think planning it all out before starting to glue made it super easy too. I really enjoyed this project, which is much different to my usual shabby cottage style.
super cute Kerryanne!
Thanks for visiting Anne. Yes, just a bit cute!!
These are SO adorable – pinning!
Thanks Roxanne. I’m kind of loving them too and nice to have something different to my normal decor.
I totally love these trees! Right after our Thanksgiving, I’m going to try this. Thank you!
One year, I left the tree up a long time. I put away most all the ornaments and left the tiny white lights, I had a basket of painted snowy pinecones and tucked them among the branches. I loved that winter tree! Now I tuck those cones in among the ornaments and linger in January with the simple cones and lights trimmed tree.
I love the natural trees too, Kerryanne! Hard to believe y’all are in the dead of Summer over there, but I know it’s true. You made the trees look all wintry though! This is a nice twist on a Christmas tree!
I so love your trees and vignette,they are perfect. Love simplicity and rusticity, so sweet and perfect. Guess will be going to neighbors street easement again for some sticks to make some of my own sweet trees. Will have Mr.Furry help me make trees since my hands don’t work so well anymore. Isn’t it lovely what hot glue will help us do? Was so happy and surprised to see a post from you, perfect way to end my Monday. Will need to come back later in morning to see what all is in the party. Is late here or should say early in morning, 12:11a.m. Til later. Have wonderful week Sorry it’s so hot there
So cute Kerryanne! Love it! xoxo
Kerryanne, these are so adorable. I love all the cute little pine cones and white ornaments you placed on the trees, especially the bird’s nest. Adding the greenery gives them the “feel” of a real tree, too cute. Visiting from Blogging 50 Link party and pinning your sweet project.
Hola!
Como siempre todas tus manualidades tan bellas y fáciles de hacer. Ya tengo los angelitos victorianos impresos para hacer esa manualidad y esta también me encantó. Gracias por mantenernos inspiradas. Recibe un abrazo desde Venezuela!
Love your sweet twig trees. They are adorable! Pinned!
I LOVE your trees, Kerryanne! They are woodsy but kind of elegant at the same time. Such a creative idea. Thanks for the visit!!
Love the festive twig trees. Pinned!