Hello creative friends,
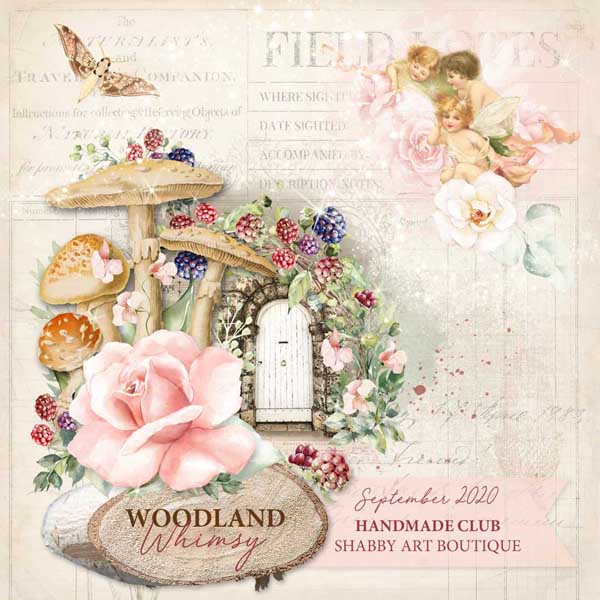
Yesterday I shared the newly released Woodland Whimsy September kit for the Handmade Club…
KIT NOW ON ETSY – click here for Letter USA & here for A4.
And as anyone who has been following my blog and designs for awhile knew, it was never going to be a dark and moody woodland theme.
I’m such a shabby, pastel girly, girl at heart and my take on woodland is filed with pretty flowers, toadstools and magic!
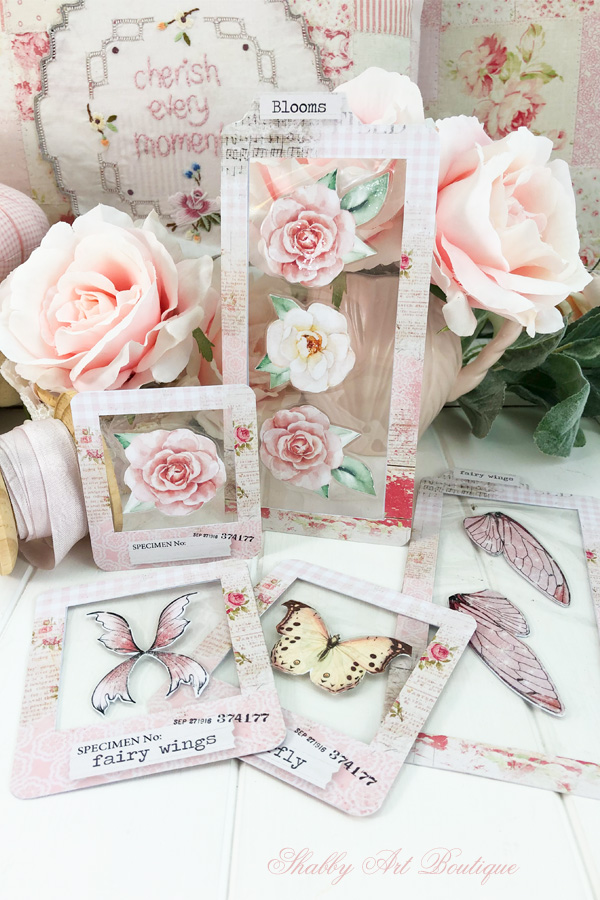
Just like my different take on a woodland theme, I also have a different way of making specimen cards and today I’m going to share with you my fun and easy shortcut for making them.
To be honest, I’m not sure if anyone else makes them this way…. in any tutorials I’ve come across for making specimen cards it seems like everyone uses similar materials, but I’ve never been one to follow the crowd and I used what I have on hand.
So, you might be asking what is different about my process…. it’s as simple as using a laminator to make the inserts.
The reason for doing this is twofold; 1. it is super quick and easy and 2. it makes for a firm insert that doesn’t warp or bend.
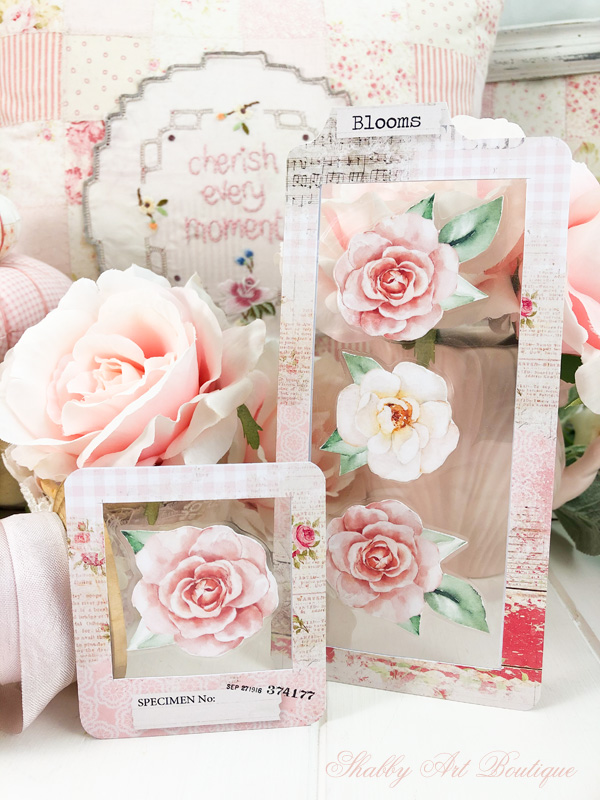
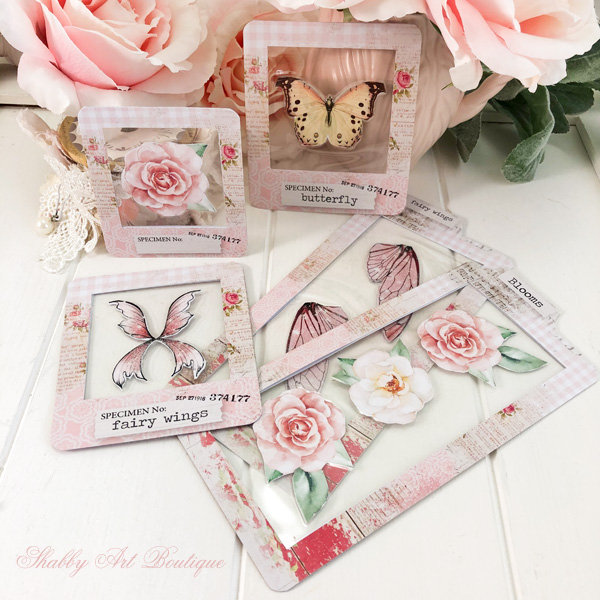
You may have also noticed that my specimen cards are not very traditional, but they do coordinate with the pretty papers in the kit and they are filled with shabby pretties like flowers and fairy wings.
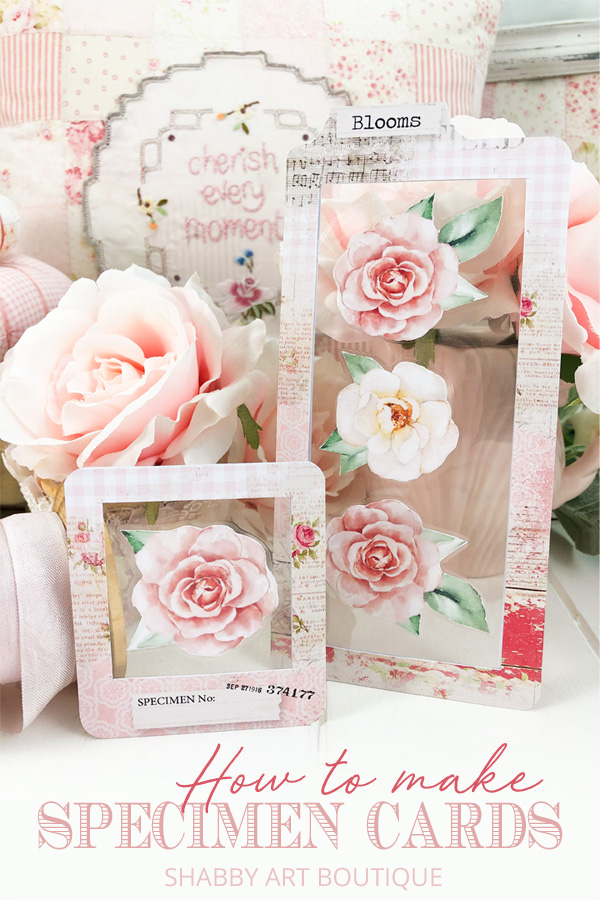
How to Make Shabby Specimen Cards
This process is as easy as 4 steps, so I didn’t think it even warranted the one minute video.
You’ll whip these up in no time!
Materials
- Specimen printables – either mine or your own
- Sharp craft knife, metal ruler and small pointy nosed scissors
- Glue; I used a stick glue for the paper specimen and a clear craft glue for the inserts.
- Laminator and laminating pouch – see note.
Note: Many families already have a laminator. I have a basic cheapy from a local office shop that cost about $15 and I’ve used it so many times in the studio. I l used it recently to make the craft box labels for my craft room.
Instructions
1. PRINT
Print out your specimen cards.
Here’s a handy tip… I’ve made them several ways, but I prefer to print the specimen card on matte photo card (that’s 250 gsm in Australia) and print the specimen for inside the insert on a lighter weight matte photo paper. Overall, it doesn’t really matter if you print it all on card, I just find cutting out the intricate specimen is easier on paper.
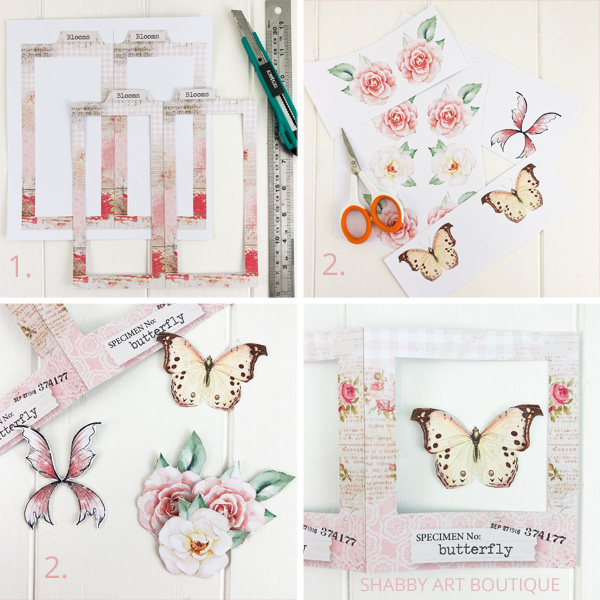
2. CUT OUT
I use a sharp craft knife and a metal ruler to cut out the specimen card shapes and remove the inside white area of the card also.
Next, cut out your specimens with a pair of sharp pointy nosed scissors. They are mirror images, so once cut ,apply just a bead of glue to the centre back of one of the pieces and line up the other half so they are back to back. Depending on how neat your fussy cutting is, you may need to trim any white areas that are showing.
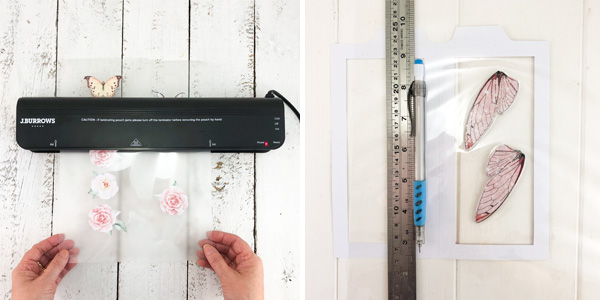
3. LAMINATE
To arrange the spacing of your specimens, open out your laminate pouch, lay your specimen card on top and line up the specimens inside the card, before gently closing the laminate pouch. You should manage to get several specimens laminated on the one laminate pouch sheet.
Run the laminate pouch through the heated laminator and then using scissors, divide up the individual specimen inserts ready to trim to size for the cards.
4. ASSEMBLE
Position the insert over the specimen card and centre the design. You’ll need to cut off any excess laminate, so that the insert will fit inside the card.
Open the specimen card, run a bead of clear craft glue around the inside of the card and position your insert. Apply another bead of glue around the edge again, this time on top of the insert and close the card. Press firmly to make sure that the entire card is sealed around the insert.
Now you can add any extras embellishments.
You may have noticed that as a ‘shabby at heart’ crafter, I often don’t ink my edges, but this is just a personal preference.
When I completed my cards, I decided to use my corner punch to create rounded corners as well.
That’s it… super quick, super easy and fun to make!
The specimen cards shown in this post are from the Woodland Whimsy kit,
but alternatively you could certainly use any specimen card printable.
If you’d like to know more about this kit —> please see this Woodland Whimsy post.
PIN for later
Happy crafting!
Hugs
♥
Kerryanne
Let’s be friends on….


Get instant access to the free printables in my Newsletter Printables
Library by joining my email newsletter subscriber’s list.
I send out a weekly newsletters with updates on all things
‘shabbilicious’ at Shabby Art Boutique.
I invite you to join our fabulous and friendly
Facebook group – Simply Shabbilicious
where you’ll enjoy our friendly banter and inspirational creativity.


Love the cards & Thanks much for the tutorial…
My pleasure Beaj.
Happy crafting,
Kerryanne