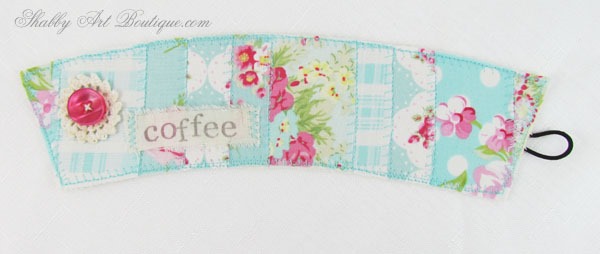
Dear COFFEE, I love you!
I try to start the day with a Green Tea because it is loaded with antioxidants and nutrients and we know that is good for us… but the truth is, I really need my morning coffee to get me out of the starting gates. So, once I’ve sipped my green tea, I follow up quickly with the bad guy, coffee!
I love my GreenGate travel mug almost as much as my coffee, but it has one flaw…. it doesn’t have a cute little coffee cosy (or cozy, if you are in the US)!
Sooo… while I was making faux patchwork last week (see my trivet tutorial here), I also whipped up a quick faux patchwork coffee cosy. Yay!!

Isn’t this fabric cosy sweet?
If you’ve already got your sewing supplies out, this little project will take you mere minutes to make.
Materials:
-
Fabric scraps,
-
Piece of muslin/calico for the backing – mine was approximately 10 cm x 30 cm,
-
Template – download here,
-
Patchwork applique paper,
-
Felt for the backing piece, 10 cm x 30 cm,
-
A button and an elastic hair tie for the closure,
-
Sewing machine and usual sewing supplies.
Instructions:
1. Gather your fabrics and trace the cosy template onto the back of your calico/muslin piece. Keep in mind, the template is only a guide. All cups and mugs vary in their dimensions, so you may need to adjust the paper template to fit.
2. Iron the Visoflex (or equivalent applique paper) onto the back of your chosen fabrics. I cut strips that were roughly 10 cm x 2 cm and 10 cm x 3 cm. As you can see in the image below, I lined them all up in a row across the strip of calico.

3. Using a fancy stitch on your sewing machine and a coordinating cotton, sew a line where the fabric strips meet. I chose a stitch that resembled hand stitching.
4 & 5. Place the elastic hair tie centrally at one end of your cosy. Stitch in place to secure.
6. I made a little stamped ribbon for my cosy. There’s a tutorial here for stamped ribbon if you’d like to add a word to your cosy too.

7. Lay your cosy on a piece of felt fabric and then stitch around the perimeter in the same fancy stitch used previously.
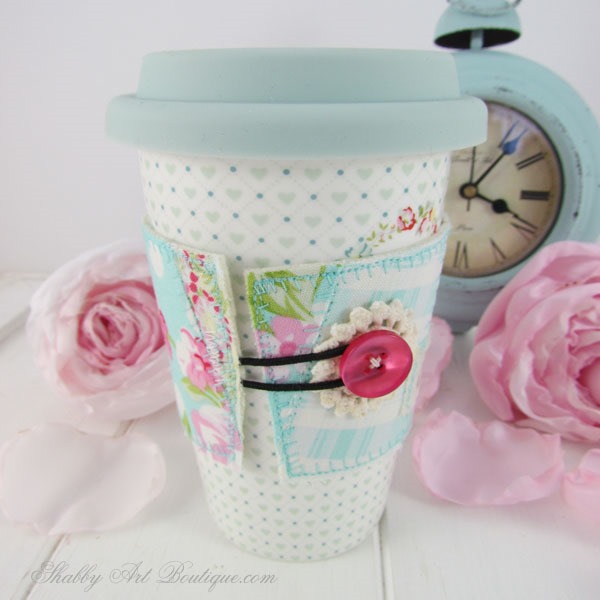
8. Wrap your cosy around your mug to find the position required for your button. I decided to add a little doily medallion under my button as well.
That’s all there is to it!! Super easy… right.
See how your elastic slips over the button to keep your cosy wrapped around your mug.
I love finding fun projects to use up my fabric scraps. This one would make a great gift too.
[Pin for later]


Happy crafting
♥
Kerryanne
I’d love for you to connect with me at:


Follow on Bloglovin
or if you’d like my posts delivered directly to your Inbox
Subscribe to Shabby Art Boutique by Email
If you’d like a private pass to all things ‘shabbilicious, sign up today for my fortnightly newsletter. It contains personal stories, sneak peeks, recommendations, discounts and freebies.


What an adorable coffee ‘hug’.
Toni xx
Thank you! I’m making one this weekend for my Tea Forte Kati cup. It’s ceramic and gets very hot! I’m sure I can adjust to fit if required. I’ll be digging through my scraps.
We have been using the coffee cups that are insulated otherwise our coffee (decaf) is cold before we get half way thru it. Ugh, am not cold coffee drinker. This cup cozy is so pretty and will be doggoned handy. Our son gave us two Starbucks San Diego coffee cups when we were there in June but coffee got cold too quickly so this cozy will be just what we need and how pretty will be also. Your project is just in time. .Sure glad you shared this with us all. Need to go digging thru my fabric stash for scraps to make trivet and cup cozy.
Have wonderful week Kerryanne Hugs to you