Hi creative friends,
A question I often get asked is “how do you use digital graphics”… and really the answer is for anything that you are inspired to create.
All of the graphic elements and papers in my digital kits are designed to coordinate around a central theme, so you know that you can mix and match any of the items in the kit.
Many crafters use them for mixed media projects, journals, handmade cards and scrapbooking crafts.
With each new collection the Design Team and I create a variety of different projects to showcase how the digital kits can be used.
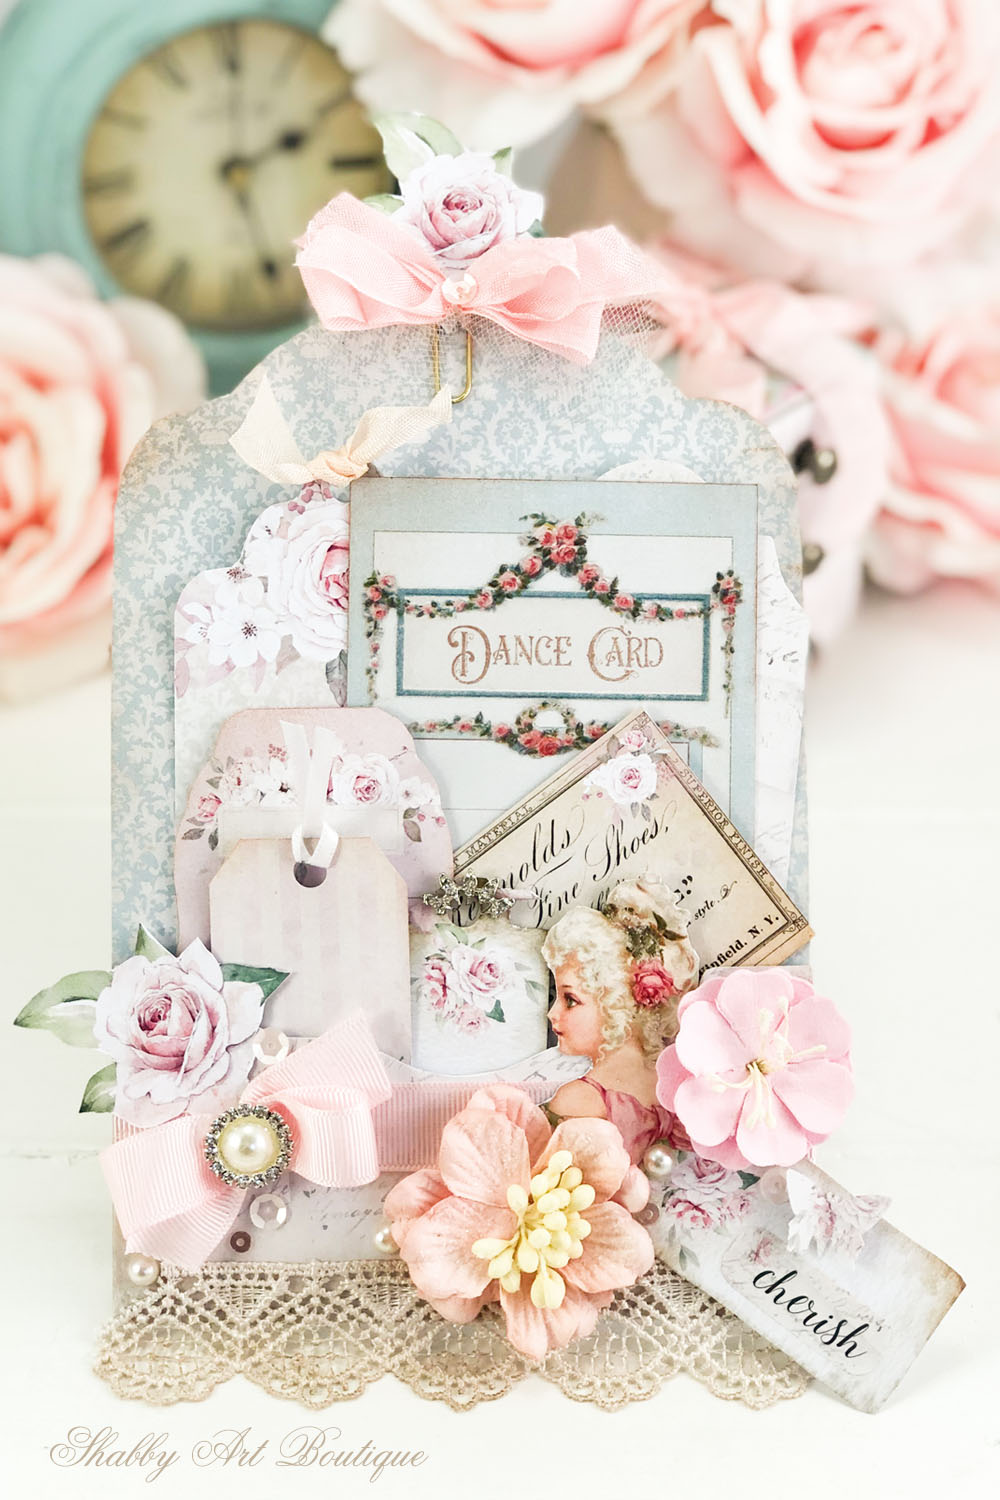
Back in 2020 I created this sweet Victorian ladies loaded pocket from ‘The Secret Diary of a Victorian Lady’ kit (Handmade Club March 2020).
So, what is a loaded pocket?
It’s a pocket tag or sometimes an envelope that is filled with cards, tags and any other item you might want to pop in there.
Of course you well know, a Victorian ladies loaded pocket is going to be filled with all kinds of ‘shabbilicious’ vintage gorgeousness!
PIN for later
In creating this loaded pocket project, I wanted to show you that by using the elements from the kit in a different way, you can create all kinds of creative projects.
This loaded pocket could be used on its own, to enhance a journal page or to decorate a pretty handmade card.
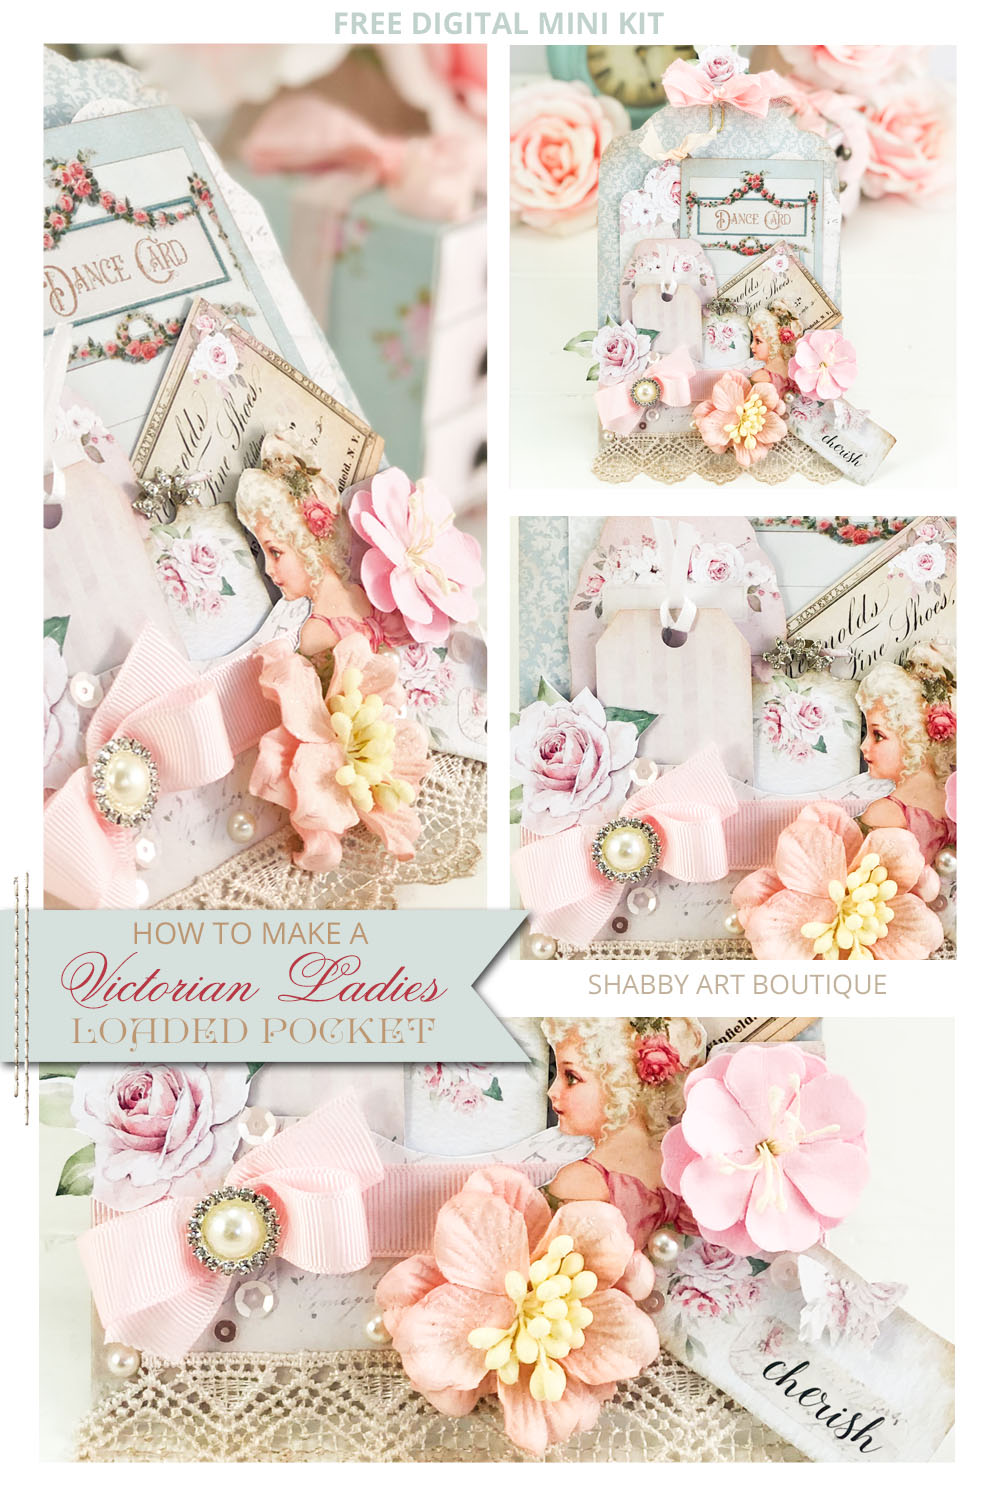
This week I’ve released the previously archived, The Secret diary of a Victorian Lady’s journal kit on Etsy, so decided to share this project with you as a free mini kit.
I hope it will inspire you ♥
Free Victorian Ladies Loaded Pocket Mini Kit
How to make a Loaded Pocket
Finished size: 5” x 8” (12.5 cm x 20 cm).
Skill level: Easy beginners project
Materials
-
Download the printable Loaded Pocket PDF.
Click here –> for the letter (USA) size printable PDF
Click here –> for the A4 size printable PDF.
(Please see note below) -
Paper trimmer, craft knife and metal ruler or scissors for cutting out the designs
-
Adhesives: clear glue and white glue like PVA or Elmers
-
Embellishments from your stash: could be things like lace, ribbon, flowers, buttons, rhinestone buttons sequins etc.
Note: Please DO NOT pin my actual PDF’s to Pinterest. It breaches my copyright and will be reported to Pinterest. I have provided a pinnable image above for this post. Thank you ♥
Instructions
1. Print the 2 design pages of PDF file on 250 gsm matte photo paper (heavyweight). Cut out all of the elements and gather a few extras to embellish your pocket front.
A note on inking: I prefer my projects to lean more to the shabby side than grungy vintage, so I rarely ink my edges and if I do, it is only ever very sparingly. I mostly add some distressing and inked edges on my actual graphics, but if you prefer dark vintage edges, then you’ll need to ink them up before assembling your project.
2. Score around the pocket tabs and fold them in. If you have a paper bone folder it will give you nice crisp edges. Apply a bead of clear glue along edges of the tabs and adhere the pocket to the backing card. You’ll notice that I had decided to use a piece of pink ribbon on the front of my pocket, so I adhered that to the pocket front before I placed it on the backing card.
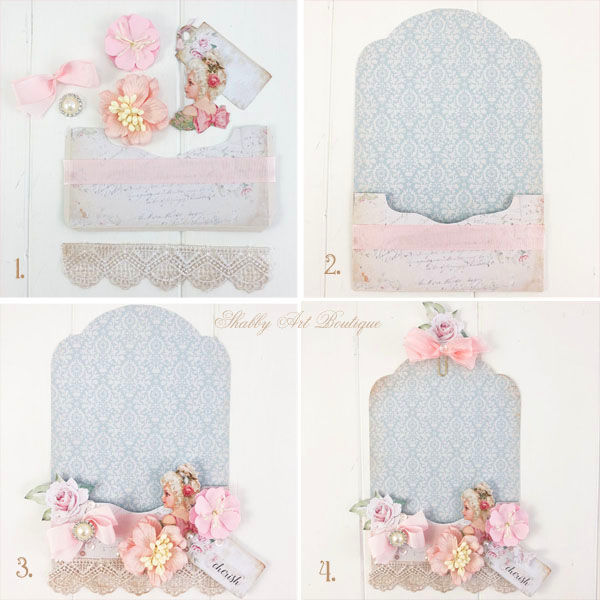
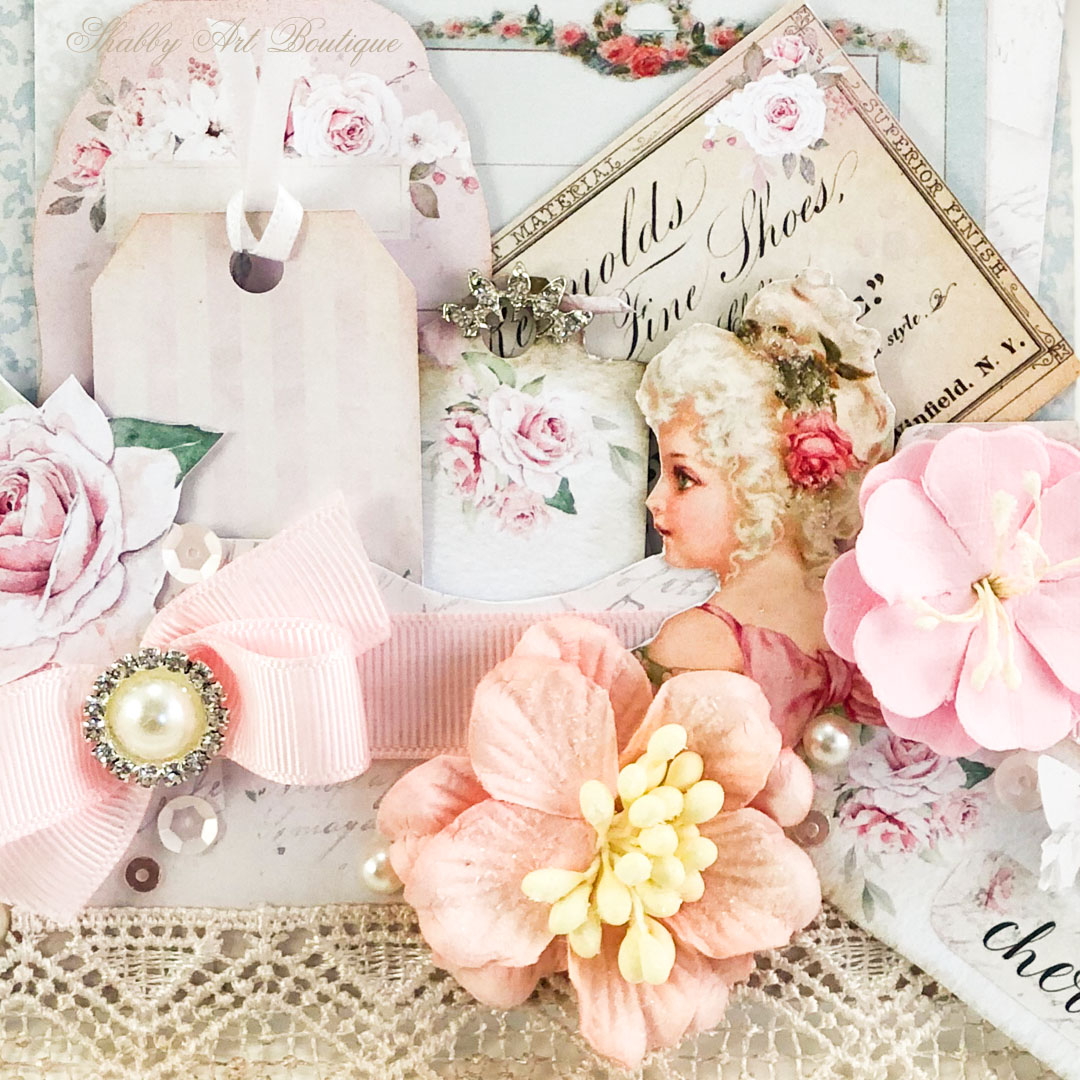
3. Decorate the front of your pocket. I used some of the items from the printable and added in a couple of paper flowers, a bow and a pretty rhinestone button. As this pocket has a Victorian Dance Card in it, I expanded on that theme of a Victorian dance or ball and added a piece of exquisite lace to the bottom of the pocket and enhanced everything with sprinkles of glass glitter and sparkly sequins.
4. The sweet rose and bow at the top of the card is actually a decorated paper clip. I simply used the rose graphic included in the printable and added a strip of white tulle and a pink seam binding bow…. they were then glued to the top of a paper clip.
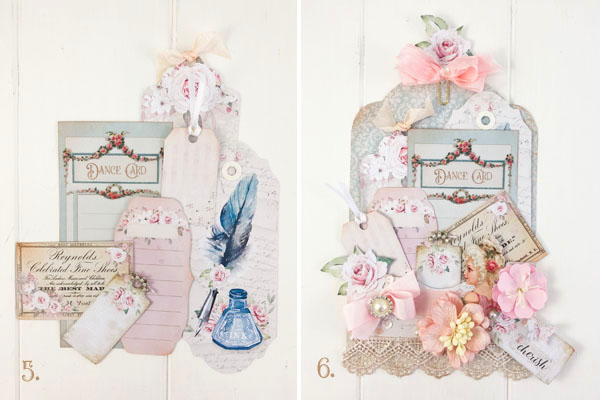
5. & 6. The printable contains a selection of cards for use in the pocket. You can of course add more items of your choosing. I further enhanced my tags by punching holes and adding ribbon, adding a few sequins and glass glitter. I even found a sparkly piece of a broken rhinestone button that fit perfectly on top of one of my tags.
This project is super quick and easy, so the most important thing is to make sure you have fun with it!!
The Secret Diary of a Victorian Lady Journal
If you’d like to see more from the Secret Diary of a Victorian Lady collection, I’ve just listed the how to make a Victorian journal kit in my Etsy store.
This 6” x 8” journal is provided to you as a ‘Print & Make’ project… meaning that all the hard work has already been done and everything you require to make this journal is ready for you to download…. you simply print and assemble.
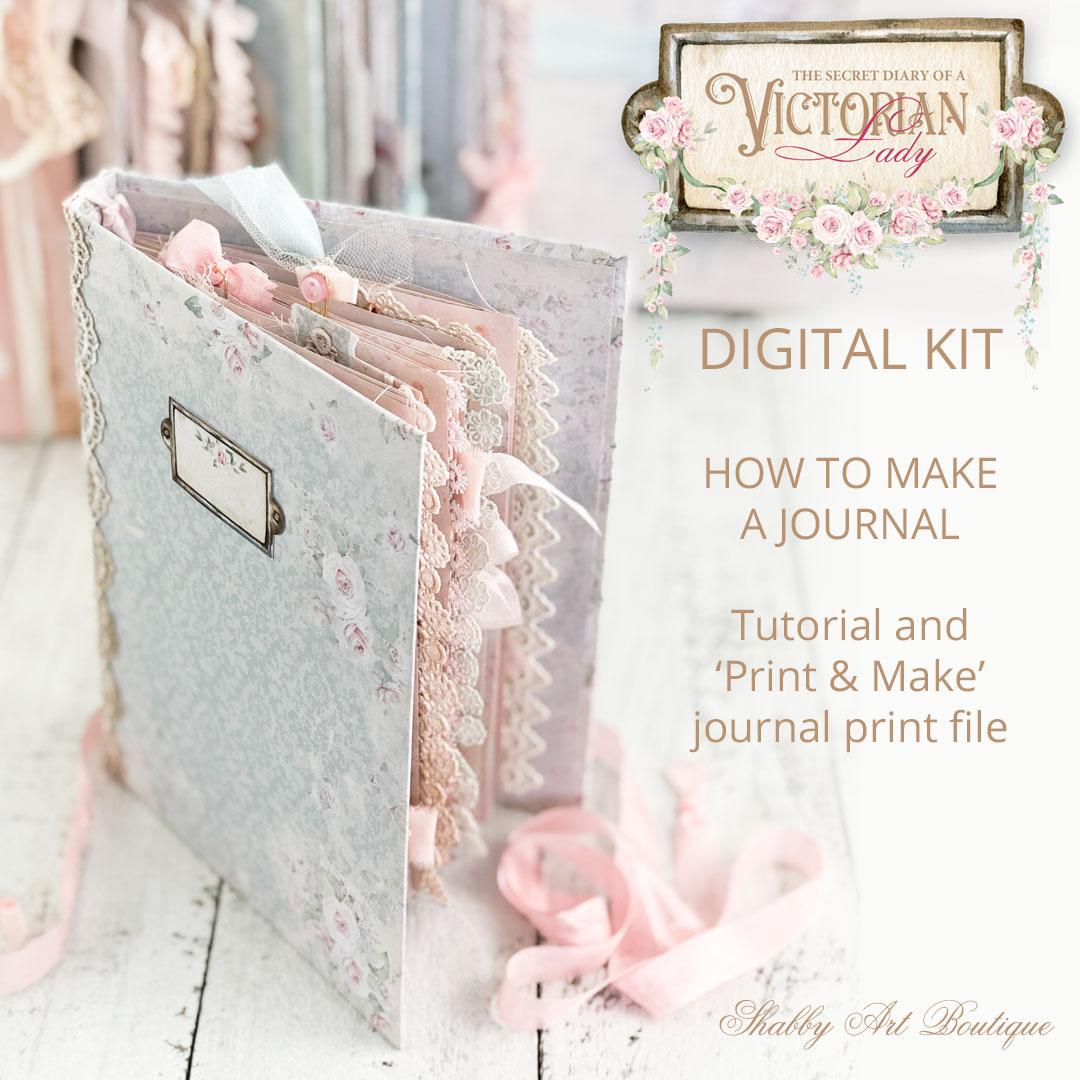
Tip: Your loaded pocket would be gorgeous on the cover of this journal.
Happy crafting!
Hugs
♥
Kerryanne
Let’s be friends on….


Get instant access to the free printables in my Newsletter Printables
Library by joining my email newsletter subscriber’s list.
I send out a weekly newsletters with updates on all things
‘shabbilicious’ at Shabby Art Boutique.
I invite you to join our fabulous and friendly
Facebook group – Simply Shabbilicious
where you’ll enjoy our friendly banter and inspirational creativity.


This is gorgeous! Thank you for the printable and the inspiration!
Thank you for the pretty printables for creating this lovely little pocket. I was trying to think of a way to give a gift card without looking like a cop out. (sort of is since I hate shopping right now but shhhh…our secret) This will look so pretty and can be a keepsake after. Your work and freebies are always so sweet. Thank you for sharing! <3
That is such a great idea for my grandchildren, adding a gift card.
Thank you Kerry for such wonderful projects that us novices can manage, that when completed look really special.
Best regards LesleyJ
Thank you so much. This pocket is beautiful.
Cheers Nita
These are such treats to work with. Makes you want to spend the day crafting. Love the colors, details and designs. Thank you for sharing and giving us inspiration.