Hi creative friends,
With Christmas just a few weeks away, most of us are now decorating and preparing for the festive season.
I’m pleased to say that my gift shopping is almost complete, so now I can concentrate on wrapping…. and eating cookies!
I’ve just created a few last minute star tags, so today I decided to share with you how quick and easy they are to make.
I’ve used the November Handmade Club kit elements and papers with a few added extras.
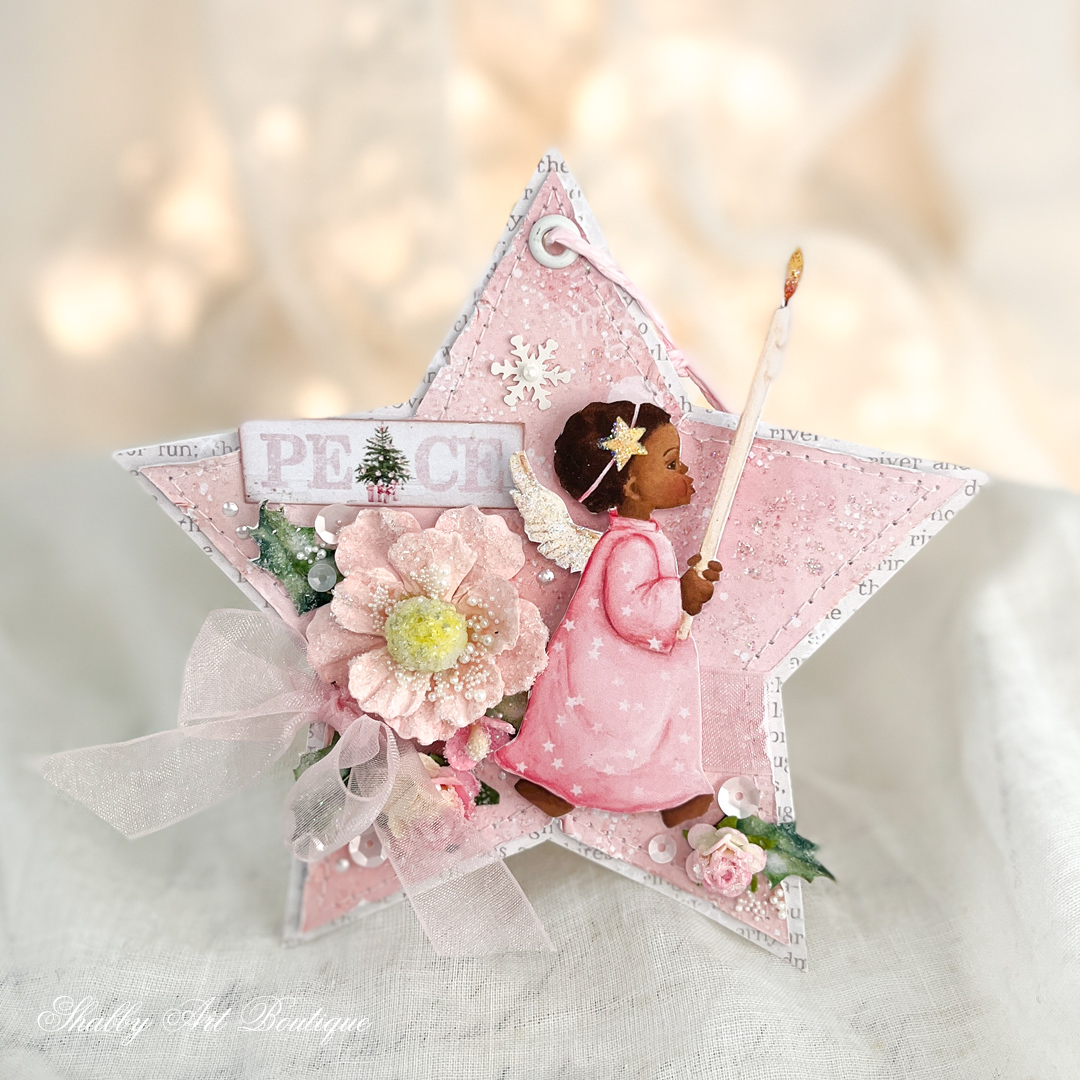
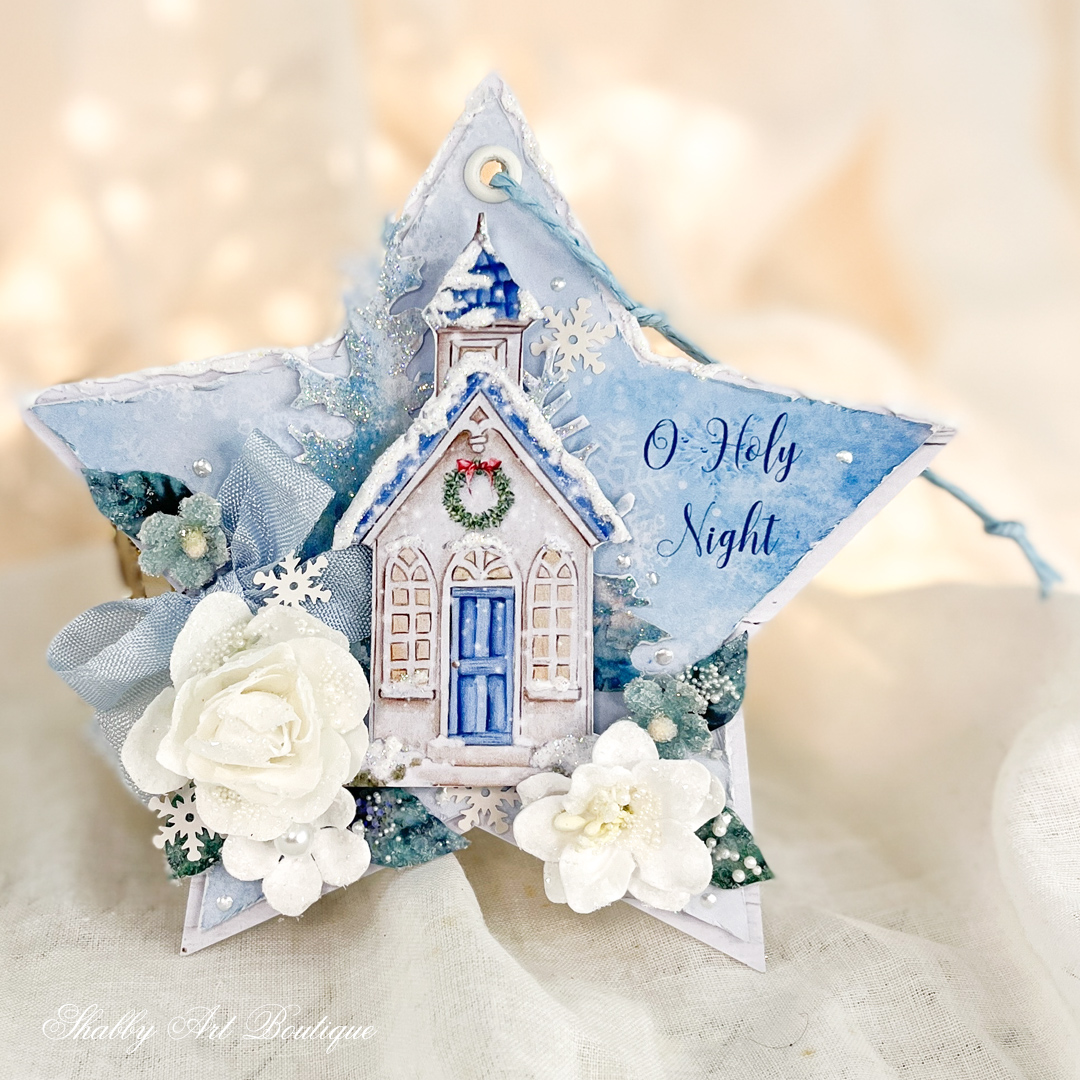
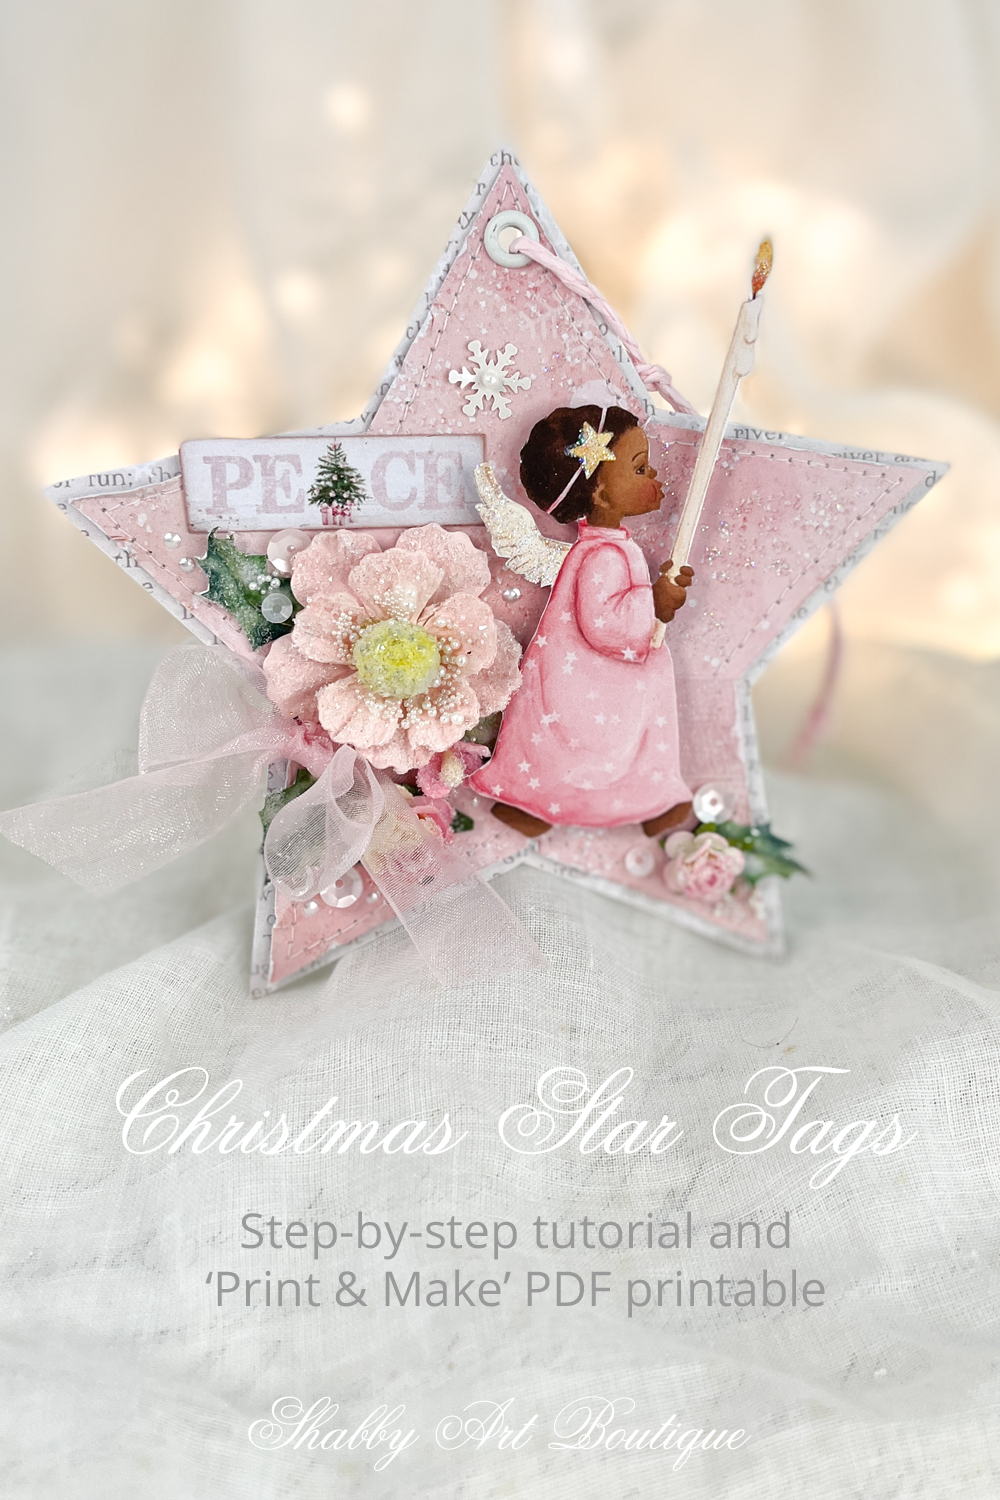
The stars are 5″ high x 5″ wide, so are a perfect size to use either as a gift tag or even as a cute Christmas tree decoration.
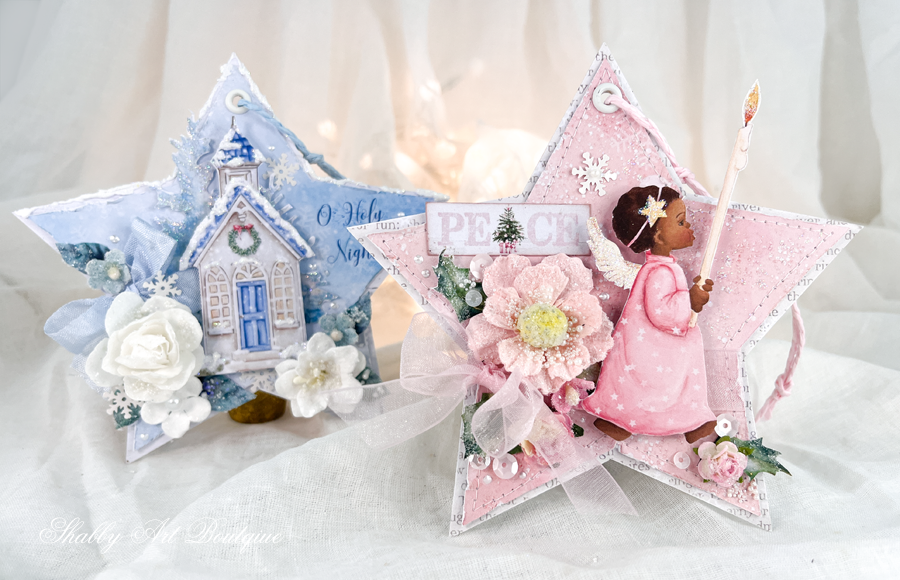
Christmas Star Tags
Materials:
- Printable PDF file from my Etsy listing ‘Print & Make’ Christmas star Tags.
- Matte photo paper in cardstock weight – 2 pages.
- White glue and clear craft glue.
- Normal crafting supplies – scissors and scalpel knife for fussy cutting, hole punch and eyelets.
- Double sided foam tape.
- Flowers, beads, sequins, ribbon etc for decorating – see note below.
- Faux texture snow – I used Aleene’s Glitter Snow.
- Ribbon or string for hanging.
Note – for tips on printing graphics at home, please read this post.
Instructions:
- Using the Print & Make Christmas Star Tags PDF, print the 2 pages on mate photo paper cardstock. Cut-out all elements.
I used an edge distresser to rough up the edges on the blue star. - Adhere the blue star to the white background star. I didn’t apply glue all the way to the edges, so that the top star had a little more dimension. Add an eyelet to the top of the star ready for hanging.
- Using your glitter snow (or alternate faux snow product) apply a bead of snow along the top edges of the star and also on the church.
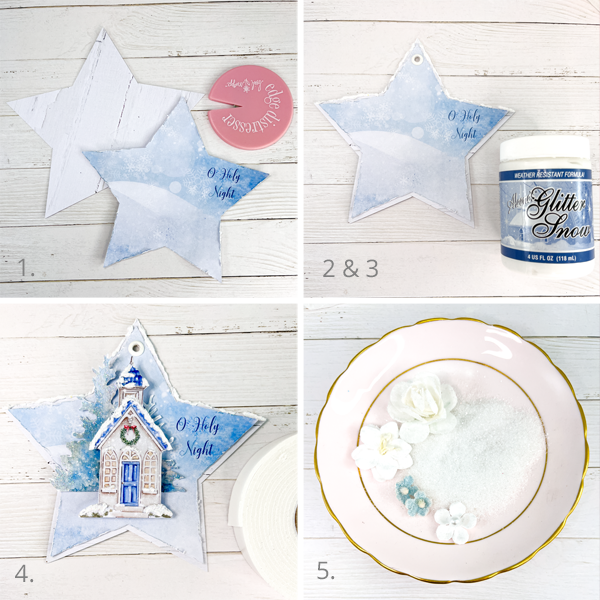
4. Add glitter to the trees and adhere to star using white glue.
Next, add the church, which is mounted on foam tape.
5. I chose to add German Glass Glitter to the edges of the flowers for an icy affect.
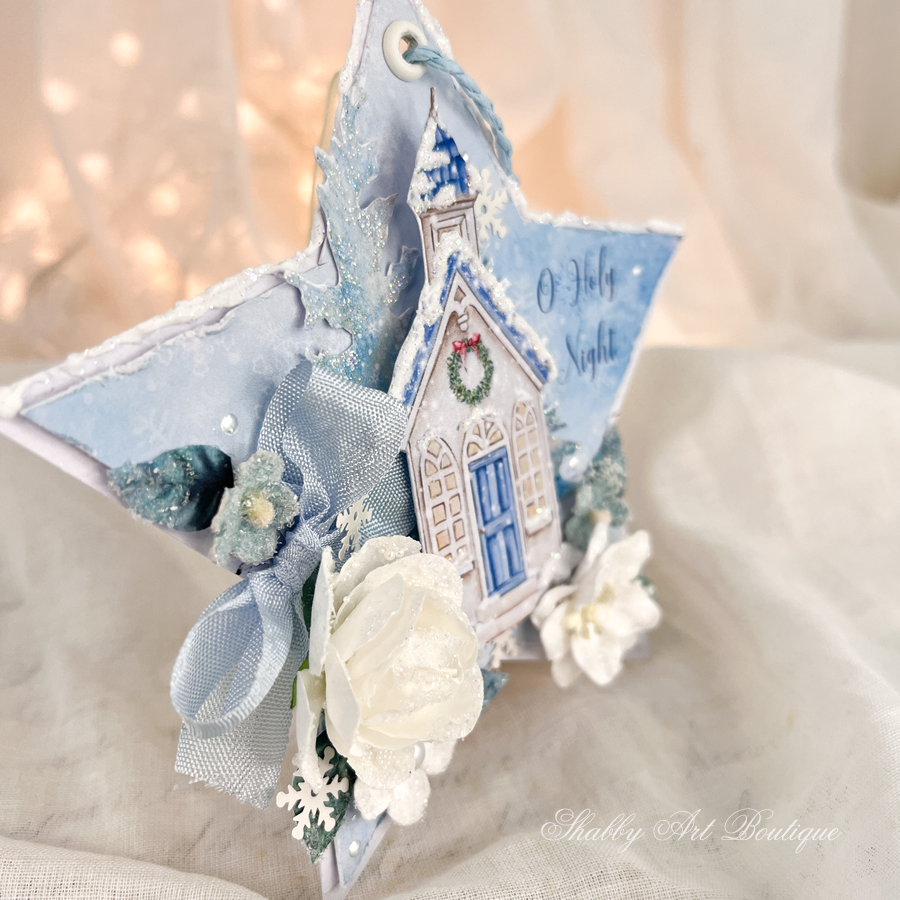
6. Adhere the flowers, leaves and ribbon using clear glue.
As a finishing touch, I added extra dimension and texture with small beads, sequins and liquid pearls – see note below.
7. Add a hanger using either string or ribbon.
I used the same process for the pink angel star, but did sew around the edge of the pink star for some added texture.
I didn’t add the snow affect on the pink star, but you certainly could.

A note about the products I use…..
I get a lot of questions about the products I use, so I’m sharing a few of my favourites that were used in this project.
I’ve provided Amazon links so you can see what they look like – these are affiliate links.
For glittering I like very fine clear German Glass Glitter and Decoart Glamour Dust in the colour Crystal.
My fav snow affects are Aleene’s Glitter Snow or DecoArt Snowtex.
Mini pearls – Dress My Crafts Flower Pearls in Snow White 30 gm jar.
Pearl dots – Ranger Liquid Pearls in white Opal.
PIN for later
The Winter Wonderland Kit
This project is from the Winter Wonderland digital collection.
Click here –> to see the letter size listing on Etsy.
Click here –> to see the A4 size listing on Etsy.

Happy crafting!
Hugs
♥
Kerryanne
Let’s be friends on….


Get instant access to the free printables in my Newsletter Printables
Library by joining my email newsletter subscriber’s list.
I send out a weekly newsletters with updates on all things
‘shabbilicious’ at Shabby Art Boutique.
I invite you to join our fabulous and friendly
Facebook group – Simply Shabbilicious
where you’ll enjoy our friendly banter and inspirational creativity


Leave a Reply